This is a photo diary of my costuming "travels"; where I've learned and struggled to make historical costumes for myself. They're not always pretty, but always fun, most of the time. And I want to share with others what I learn along the way. **You can find me on Facebook, https://www.facebook.com/Time-Traveling-in-Costume-640703499399817/ or have my posts delivered to your email by signing up at the lower part of the right column.**


About Me

My photo
HI, my name is Val. I'm a member of Costumer's Guild West in Los Angeles, Dean of 2018 & 2024 Costume College; Past President of the San Diego Costume Guild, member of Orange County Costume Guild, and a representative of the San Diego History Center. I also put on historical fashion shows for various groups. I make my own historical costumes but don't sell any unless I get tired of one.The eras I've made so far are 1770 up to 1918. My favorite is the 1880s bustle.

Followers

Wednesday, October 25, 2017

AN 1890s FASHION SHOW FOR A NEW EVENT IN OCEANSIDE, CA

A couple months ago, one of my friends, Shelley Peters, of the Kansas Mercantile, contacted me about being in a fashion show for a new event in Oceanside. This would be the Grand Spanish-American War Reenactment and focused on the return of the soldiers in the 1890s. This would be its first year and with it being in close proximity to me (ok, an hour away), it was workable. And after I saw the location at the Oceanside Heritage Village Park, I was even more interested. AND I would get to wear one of my 1890s dresses, since we have so few chances to do that.
This is the description of the event from the site: The reenactment will consist of a military parade, volunteers such as the Rough Riders, Buffalo Soldiers, and the "1898" Mayor of Oceanside, will be there along with music horse-drawn carriage rides, and tours of the historical buildings. The Ice Cream Parlor will be open, and other food vendors will be present. The event would be held on September 30-31, 2017.  
The Village is in a small park with a collection of old buildings, many looking like shops and stores. In the center of the “town center”, surrounded by grass, is a beautiful white gazebo that bands play in. This was to be the “stage” for our fashion show, and we would walk around the pavement among the attendees.

According to the daily schedule, they would have an Exhibition of a Soldier’s Life, and military camps; a model train exhibit, a parade, a US Marine Corp Band, dignitaries and speachifications, and of course, a fashion show. That’s us! 

I missed seeing most of the event due to being extremely late in arriving to change into my costume for the fashion show. It wasn’t because I had the wrong location, due to the wrong street name being on the event page (because I’d already figured that out) but because I missed taking my exit.  If anyone is familiar with I-5 and Oceanside, if you miss your exit, you have to continue 14 miles passing Camp Pendelton, before you get to another exit to turn around. And I was almost driving on an empty gas tank by then. So after quickly gassing up, I managed to get to the event, sneaked into a back gate to unload, and get inside to change. During this time, friends drove my car up to the parking lot so it wouldn’t continue making that poor horse behind the carriage nervous who I had parked behind. I hoofed it out to the “town center” with five minutes to spare.
Our time period for the fashion show was the 1890s, of course. I had a couple options to wear, but chose my 1894 blue and white striped seaside dress because we were at the seaside. And it was much cooler to wear.
I’m extremely grateful to Nancy & Russell Smith, and Paige Patterson, for generously allowing me to use their photos for my blog, as we really want to help promote this event for next year. So please enjoy all these photos they took.


Shelley, who ran the fashion show, was also able to set up her Kansas Mercantile shop inside one of the buildings, and it was the perfect décor for all her goods. She was quite happy in there. 
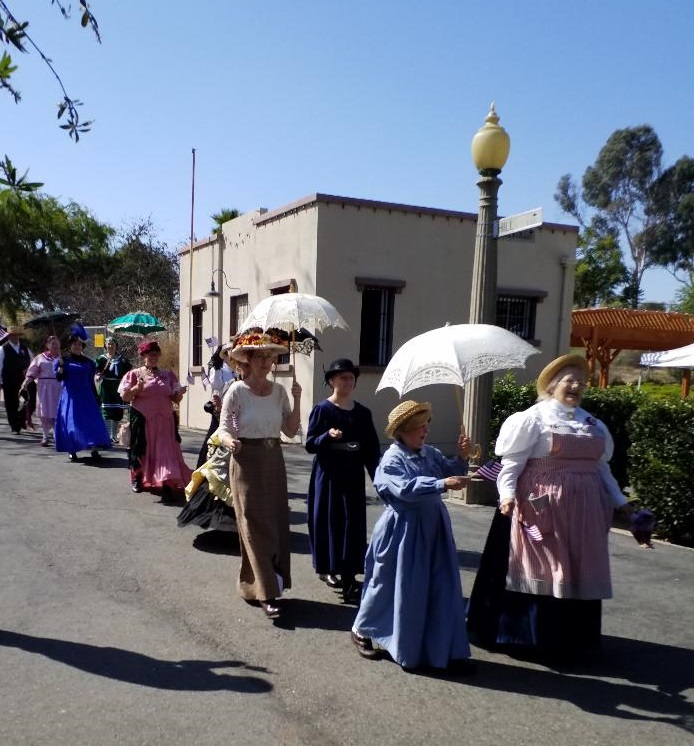
Our fashion show was outdoors, with Shelley narrating from the gazebo. We walked out onto the pathway and around the courtyard with the audience seated around us, while Shelley read descriptions of our outfits, and details of the style of the 90s.

Our dress styles ranged from daytime, to leisure activities, to evening dress, and we even had three men join us. 


As I mentioned, I wore a dress I already had but got to bring my recently recovered parasol, and show it off. I also interacted with the audience, who asked questions.

I did have one minor foobah with my boater hat earlier, as the antique blue ribbon around the crown had started to shatter, so I tacked on some vintage flowers to cover that up. 

Hopefully next year the word will get out more about this event, and we’ll certainly come back. We plan on letting a lot of our costume and reenactor friends know about it. Shelley already told me she wants me to take over the fashion show so she can focus on her Mercantile shop.

                                                            ~~Val~~

Monday, October 16, 2017

FOLLOW-UP ON BIEDERMEIER HAIR RIBBON LOOPS

Last week I finished up making my set of hair ribbon loops that I thought I would wear on my 1830s wig for a fashion show but after putting the crown on with the chess pieces (more on that in another post), you really couldn’t see the hair or the ribbon loops. So off they came for another day.

They looked awfully cute though and I can’t wait to make more, in a variety of colors someday. This was kind of the look I was going for, loops plus some spikey things to the side. 
A reminder of how I did my ribbon loops: I cut the ribbons to the length I wanted to fold in half to make them, and also ones to poke out on the sides with a V cut into them. I brushed some of the Stiffy liquid on the backsides, folded them into a loop and used a straight pin at the bottom to hold them together. I think it took about an hour to dry. From my previous test, I liked the hold of the Stiffy ones best. 
I thought at first I would be pinning each loop into my hair and trying to get them to stay at the angles I wanted them but that didn’t work. So then I came up with the idea of sewing them all together, and that worked perfect. I first test pinned them into my hair to check the angles, then basted one loop to one cut single ribbon. 
Next, I thought at first I would be pinning each loop into my hair and trying to get them to stay at the angles I wanted them but that didn’t work. So then I came up with the idea of sewing them all together, and that worked perfect. I first test pinned them into my hair to check the angles, then basted one loop to one cut single ribbon. I pinned the two sets of ribbon together at the angle I wanted, and basted those together. I didn’t like that raw finish on back, and made a looped bow to cover them. *Disclaimer, I’m horrible at making bows.*

With those done, it was easy to just use bobby pins to place it on my topknot. They’re in there quite sturdy too. 

There’s so many fun things you can do with this style by adding flowers, leaves, combs, sticks of beads, wheat sheaves, you name it. The sillier the better.


I have a dress in my MAKE THESE file that I hope to incorporate this hair comb with. 

If you want to see some more of these hairstyles, watch the movie, Wives & Daughters, based on Elizabeth Gaskill’s book.  


                                                         ~~~Val~~~

Tuesday, October 3, 2017

THOSE WHACKY BIEDERMEIER HAIR RIBBON LOOPS

*A Non-Historical How-To*
Quite by accident today, I was playing with some ribbon, trying to figure out how to create loops of ribbon to go in my 1830s hairstyle. That’s a wig I’m wearing, btw. They would need to be tall and stiff to stand up but the ribbon, unless it had wire in it, was pretty floppy. The Biedermeier period ran from 1815-1848 but you mostly see these hairstyles in the 1820s-30s.

I had saved a lot of photos showing the different way ribbons were used in the lady’s hair, caps, or on hats. Some were loops, others were trimmed off and artfully displayed. And they stood up like little soldiers! Maybe they used cornstarch, but I don't know.  


In the past, I had made loops of fabric to trim a hat but had wrapped the fabric around strips of buckram to hold them up. I knew there had to be another way to do this for hair.

The day before, I had been using some Mod Podge on another project, which is used to decoupage things, and dries mostly clear and pretty stiff. I wondered if by brushing this onto the ribbon might make it stiff and keep it in a loop without falling over. So I rubbed some on a small test piece, gently folded it and tacked the bottom ends with a straight pin, then patiently waited it to dry. While I was waiting, I also remembered I had a bottle of Stiffy, which can be used to stiffen fabric. I’ve used to it create a lace hat. So I did a second sample, and waited while they both dried.
BOTH worked quite well! I brushed the liquid on the insides of the ribbons so nothing would show on the outside. They both had a slight sheen after they dried. But you don’t see it on the outside. The Stiffy one is quite stiff, while the Mod Podge one has a bit of softness. But both will work fine for this. Also, the bottom ends of the ribbons stayed glued together so you may be able to run a hairpin through that to hold it onto your hair. 
Both these water-based products can be purchased at Michael’s Craft Stores. The Stiffy was $2.99; and I think the Mod Podge was $5.99.
So next time you want to stiffen up some ribbon, lace, or fabric, or other trims for your hats or hair, try them. But test it first on a bit of your ribbon or fabric.
 ~~~Val~~~