This is a photo diary of my costuming "travels"; where I've learned and struggled to make historical costumes for myself. They're not always pretty, but always fun, most of the time. And I want to share with others what I learn along the way. **You can find me on Facebook, https://www.facebook.com/Time-Traveling-in-Costume-640703499399817/ or have my posts delivered to your email by signing up at the lower part of the right column.**


About Me

My photo
HI, my name is Val. I'm a member of Costumer's Guild West in Los Angeles, Dean of 2018 & 2024 Costume College; Past President of the San Diego Costume Guild, member of Orange County Costume Guild, and a representative of the San Diego History Center. I also put on historical fashion shows for various groups. I make my own historical costumes but don't sell any unless I get tired of one.The eras I've made so far are 1770 up to 1918. My favorite is the 1880s bustle.

Followers

Monday, July 11, 2022

MY HELLO DOLLY HAT PROJECT


I bought this hat years ago, I think around 2008, at an antique store in La Mesa, CA, where I’d found a couple other antique hats. On picking it up, I knew right away it was a wire frame by the weight and the ribs of the wire in it. The shape was slightly warped, with the brim bent in a few places, and the crown looking like someone had sat on one side of it. The fabric covering it didn’t look original but the acetate ribbon and cut steel buckle on it did. The ribbon had a beautiful cream lace stitched around the middle of it. It had wads of Kleenex stuffed in each ribbon loop to hold its shape. The fabric was a dingy cream polyester that had a couple brown stains on it, but the ribbons were in decent shape, although faded from possibly a lilac to a greyish-pink.   The owner of the shop told me it had come from a theater, where it might have been recovered in the cheap fabric. It kept reminding me of another hat, and years later I finally found the photo of one that Barbra Streisand wore in Hello Dolly, that was similar and that was the one I remembered. Although it wasn’t wearable in its current condition, I knew I would like to recover it someday. So, it came home with me. It would forever be named the Hello Dolly hat.

Jumping ahead to 2022, I found I was in need of a hand project while I was in a recovery mode, that wouldn’t require a sewing machine, and this looked like a good time to recover this hat. I decided to document this project to further give me more to do. First, I wanted to get it dated. I found a couple fashion plates showing similar shaped hats from 1903-1908, so that gave me a good ballpark for its eventual dress to go with it.


For starters, I took lots of pictures of its condition and how it was sewn together for when I started to cover it. The ribbon was very loosely basted on, with a few extra stitches holding the buckle. 


The rest of the hat was also very loosely sewn by hand, with large basting stitches. The only place I found it machine-sewn was the edges along the brim. The outside edge of the brim fabric was sewn and then placed over the wire frame, and loosely attached to the bottom of the crown. My friend, Mela of Atelier Mela, told me this was very common in hat making as they were produced very quickly and weren’t meant to be rigid and heavy, as we tend to make them now. The inside of the crown had a bag that was attached to the edge of the crown, and had a blue silk ribbon drawstring pulling it closed.  


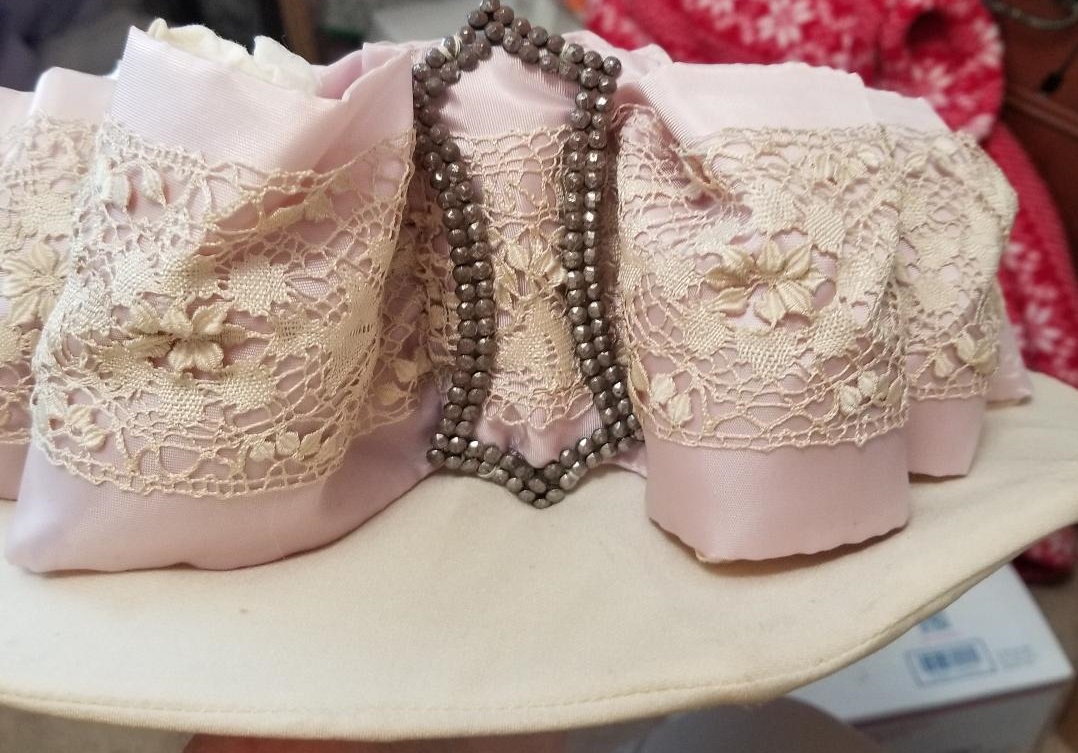
As I was removing the fabric, I kept getting a powdery substance falling on my lap from it. When I exposed the lining, which I first assumed was netting, more of the powder came out and some in the seams were brown. Later, after friends were seeing the photos I was sharing, they identified the netting as originally being buckram. But the glue had dried and turned to dust, and now the buckram was very soft, not giving any structure support.  I saved all the fabric pieces to use as my patterns for recovering it.  


As more of the wire was exposed, I could see how badly it was misshapen from being bent. I used some pliers to try and straighten some of them out but at some point, I decided it would have to be camouflaged by its trims. None of the original buckram was salvageable.


I used the original fabric pieces I’d saved and cut new ones out of a slightly whiter satin polyester than the original cream, using the dull side of it, and also thin fleece, that quilters use, to soften the wire frame work. I first basted the fleece on all the wire pieces. After I repeated sewing the fabric pieces on top of that, again basting them on, except for the final piece that went around the crown, I decided not to machine-stitch the satin to the edge of the brim but instead just basted the top and bottom on. Then I added a bias strip of the fabric around the edges. I did some tiny stitches along the top of the brim where it would show, flipped it over to the underside and slipstitched that portion on. Easy peasy! I kept Mela’s tips in mind as I sewed, using more basting stitches, or not as close as you would if you were making a dress. I sewed the final piece of satin around the brim, taking nice slip-stitches, knowing this would show.


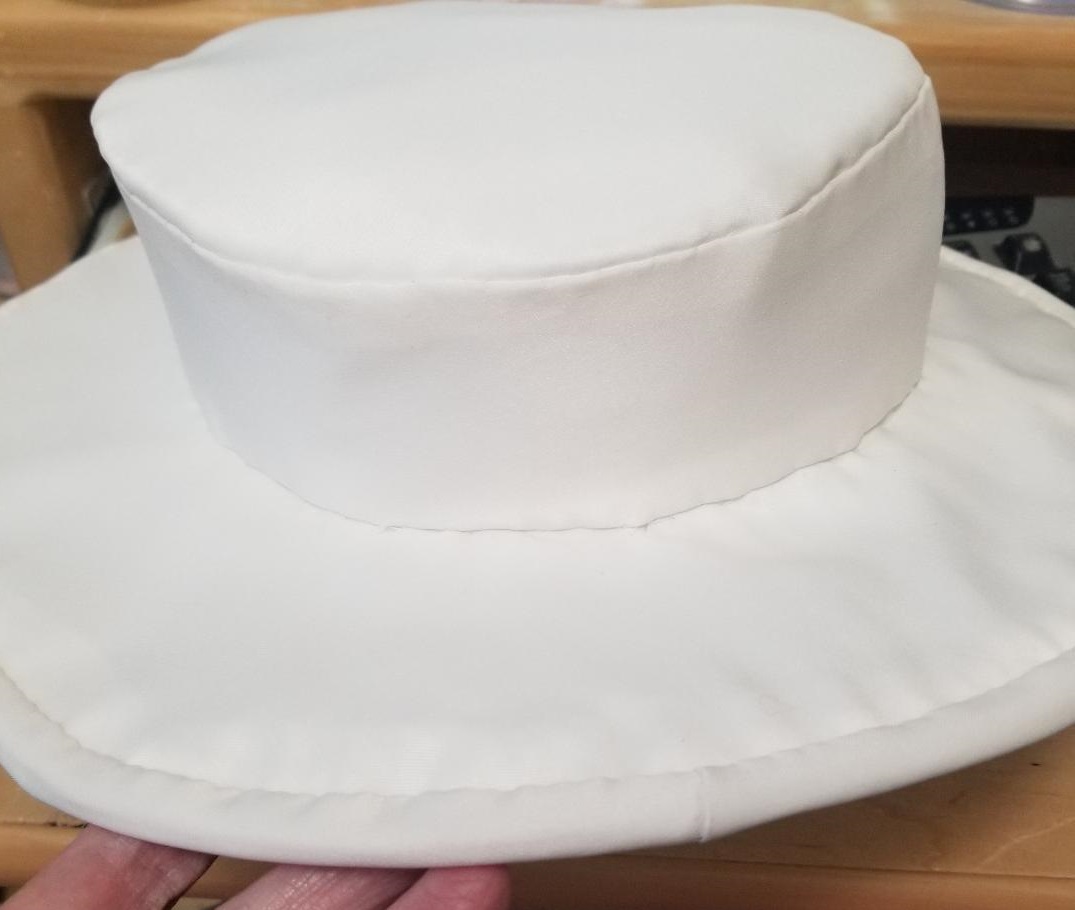
I finally finished after a couple weeks of delays while we were packing and moving furniture to have our floors replaced. I added the ribbon trims back on yesterday. I’m thinking I might stuff a bit of polyester fluff inside the loops to give them some shape. I had to iron them by putting a rolled-up washcloth inside it but they don’t have much stiffness to them. It looks pretty similar to the original but much cleaner and fresher.

I already began a dress that will go with this. It’s called my Wedding Dress Project, where I deconstructed my wedding dress that my Mom made me, and am remaking it into an Edwardian white dress. So far, the dress has been taken apart and I have my plans in place, but it will have to wait because now everything in my sewing room has to be packed and moved out for the carpet to be replaced with wood floors, And I have Costume College at the end of this month, so my focus is on that. I’m in charge of the Costume Exhibit there, and am teaching two classes on accessories from 1800-1900. But I think I need some more hand work to do.

These are a couple more hats I bought at different times from the same store. The black bonnet was actually just two pieces of wire frame that I recognized as being pieces of a bonnet. My friend Lynne offered to recover it in vintage materials in exchange for using it as a sample in one of her classes. I've been able to 
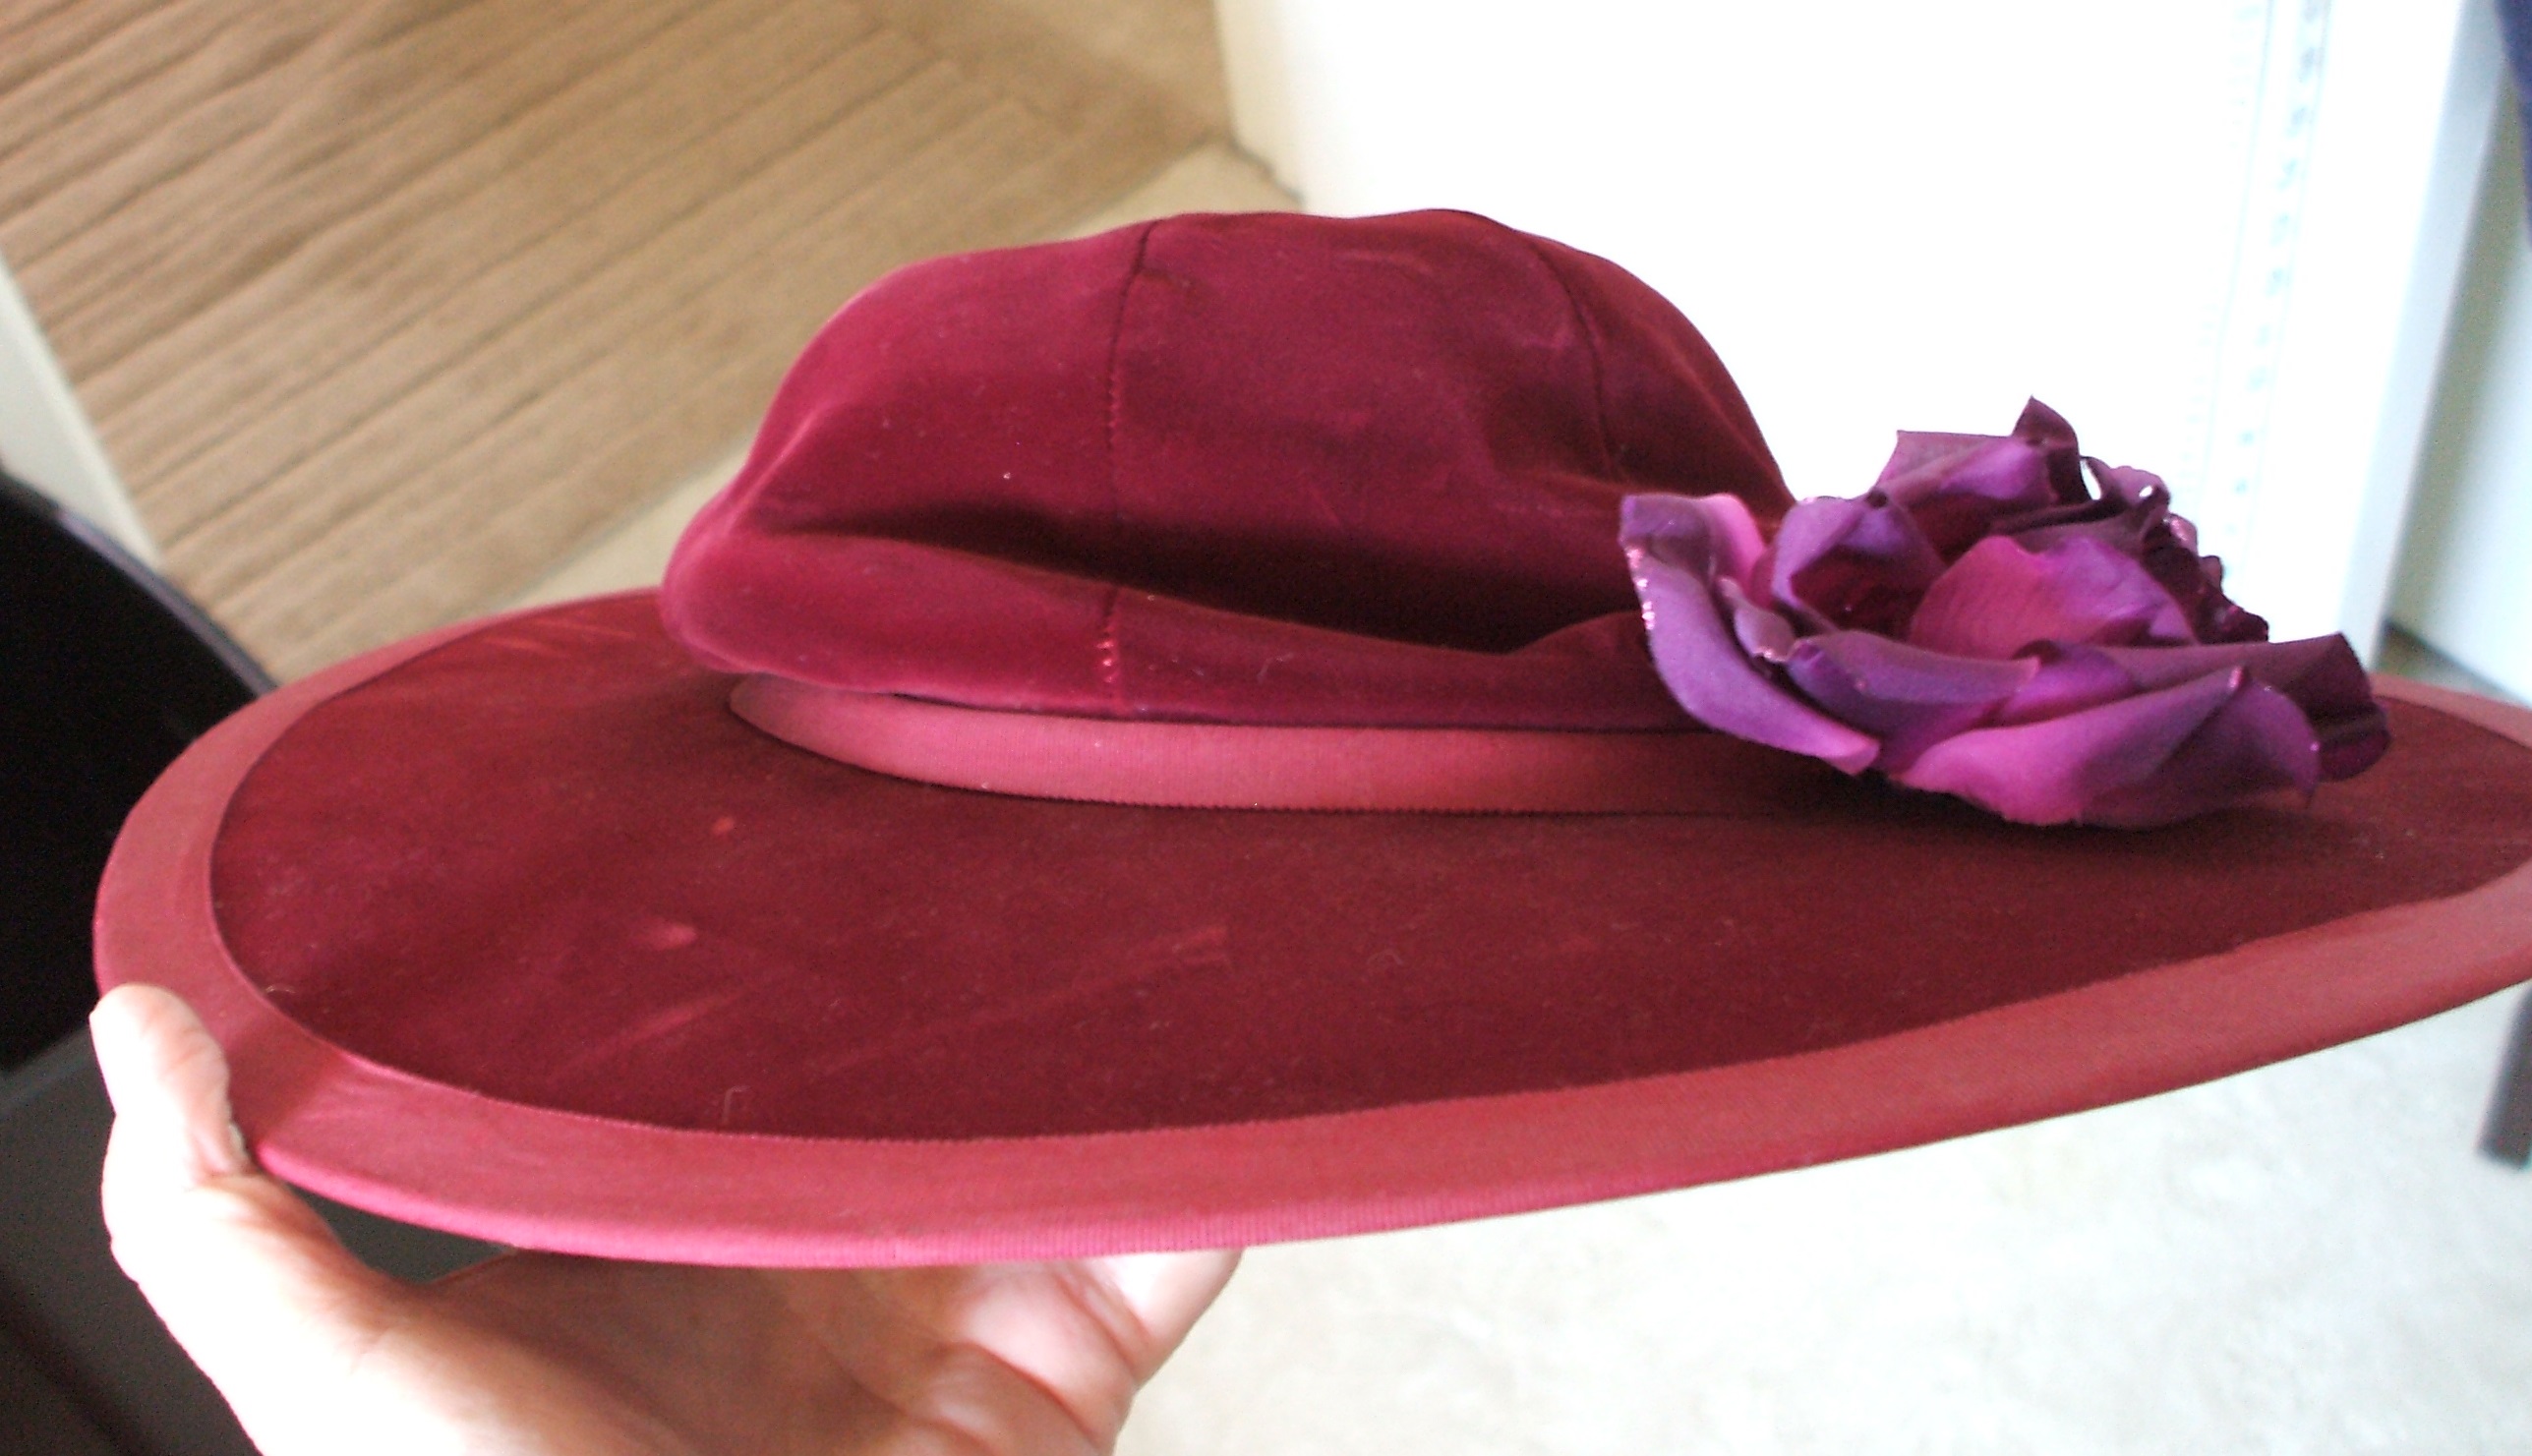
wear that one. I took apart the red velvet one in anticipation of doing the same thing as my Dolly hat but found out the brim is made of some kind of cardboard and the velvet is glued to it. The crown is a soft circle. Unfortunately, I’m not able to sew through the cardboard, or remove the velvet. So, I’m at a standstill with that one. The blue velvet hat I believe is also a wire frame, but right now is packed away so I can’t check. I think someone got a little carried away with throwing all those flowers on it, and the feather is a bit sad. If I remember right, it’s the same shape as my Dolly hat. Darn, now I want to play with it.