This is a photo diary of my costuming "travels"; where I've learned and struggled to make historical costumes for myself. They're not always pretty, but always fun, most of the time. And I want to share with others what I learn along the way. **You can find me on Facebook, https://www.facebook.com/Time-Traveling-in-Costume-640703499399817/ or have my posts delivered to your email by signing up at the lower part of the right column.**


About Me

My photo
HI, my name is Val. I'm a member of Costumer's Guild West in Los Angeles, Dean of 2018 & 2024 Costume College; Past President of the San Diego Costume Guild, and a representative of the San Diego History Center. I also put on historical fashion shows for various groups. I make my own historical costumes but don't sell any unless I get tired of one.The eras I've made so far are 1770 up to 1918. My favorite is the 1880s bustle.

Followers

Saturday, April 15, 2017

1894 Brown & Aqua Dots

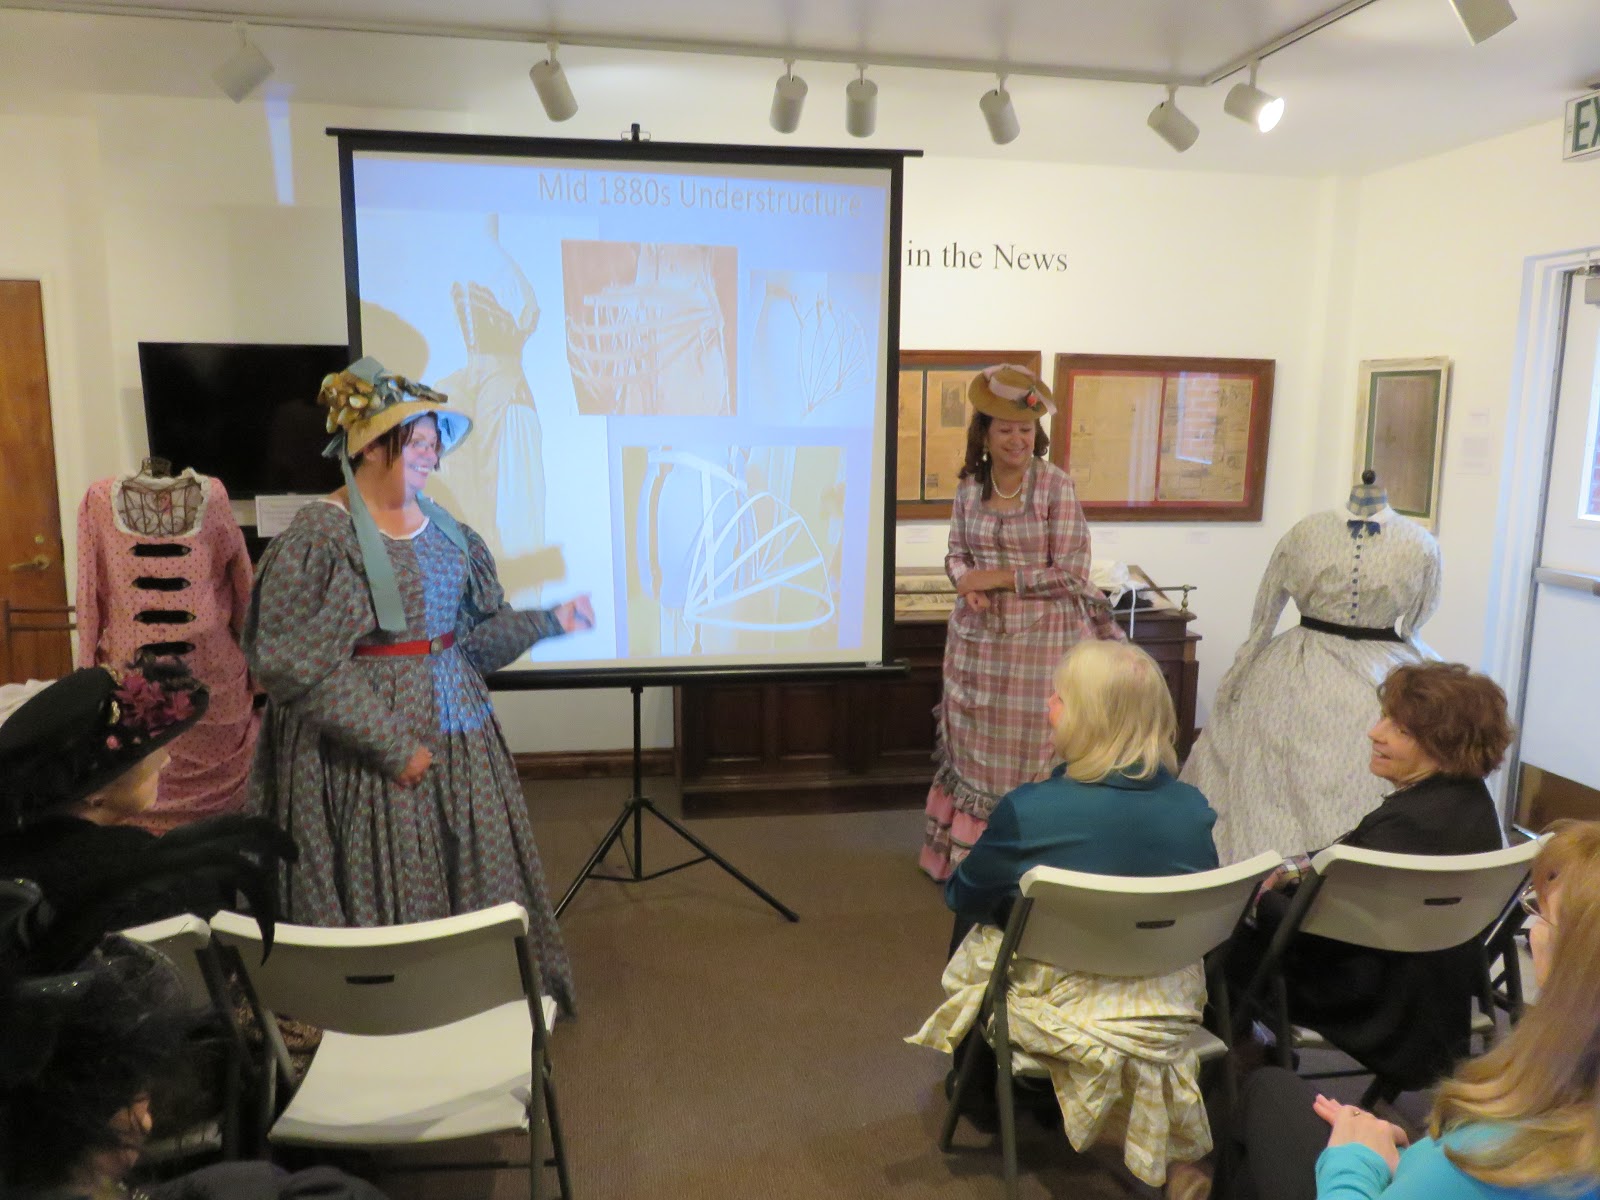
This was something I was able to sew very quickly to wear to the Port Townsend Victorian Heritage Festival for 2017.
The 1890s have become a new passion for me. Besides it being a very quick and fairly easy pattern to make, it doesn’t require a lot of under-supports that make it hard to travel or move around. I had the two Truly Victorian patterns, #494 -1894 shirtwaist & #291 -1898 skirt for a while, but hadn’t made the shirtwaist yet. After I saw it on two of my friends, I knew it would look good, even though the sleeves in the pattern photo looked “scary”.

So, my favorite part began: researching from various sites of ideas for fabric colors/patterns, different ways to trim the bodice and skirt, hats, purses, and of course hair. Except the hair never happened. I ran out of time before I had to leave town and wear the dress. 
Pinterest has become my go-to site now for photos of extant clothing, and I especially love it when the item is dated, although you still have to be wary of that since even museums get it wrong sometimes. Besides getting ideas for fabric to look for, I picked some of my favorite parts of the dresses 
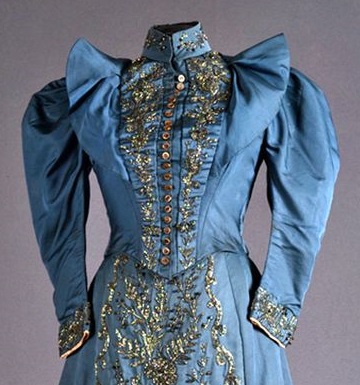
for adding a trim to the shirtwaist, and I knew they liked bright colors. I liked the contrasting bow you often see on the back of the collar but later saw it was near the end of the 90s, and my dress would be around 1894. 


For the past year, each time I went to the Garment/Fabric District in Los Angeles, I was keeping my eye out for fabrics that said 90s to me. Finally, this one popped out at me. It was a deep chocolate brown with aqua, dark brown, light brown and cream polka dots embroidered on it, for $3 a yard. Granted it was a curtain fabric, and I had to line it in cotton, but to my eye it was perfect. I happened to have an 8” wide strip of aqua silk taffeta that matched the one dot perfectly, and I had to squeeeeeeeze out bits of it to make my lapels that I finally put on the front of my shirtwaist. I was limited in the width of the lapels by the width of this scrap of fabric. So sad. I’d hoped I’d have enough to do the neck bow but sadly didn’t. However later when I saw that was for a late 90s dress, I didn’t feel so bad. The sleeve shape for that year was different too.
Since I’d made the skirt before, that went together very quickly. I did a separate lining for it in brown cotton and just attached it at the waist with a separate hem. It’s very satisfying to have that hanging on my dress form so quickly. Except then I had a minor disaster. I had been ironing this fabric with no problem on high steam.  The following day after I sewed the pocket in, I turned on the iron, and before it had a chance to get really hot, I set the iron on it, and partially melted an iron-size spot right at the top of the waist. Eep! Why the heck does polyester melt at a low temperature, and not a high temperature?!! In a couple places the fabric had separated so in desperation and a temporary repair, I put Fray-Check on them, and hoped it would be good enough for now. I still have lots of extra fabric. *More on that later in the story.*

I played with the pattern and decided to do the blouse attached directly to the peplum method, without the belt insert. I didn’t plan on wearing the peplum out over the skirt as I’ve seen some do. I also didn’t have to do a lot of fitting on it because it just gets gathered into the peplum and it’s a loose-fitting shirtwaist. That’s one thing that makes this go together quickly. And it’s front buttoning, so yay!
Here’s a note once you start laying out your pattern pieces. The back piece says CUT 2 ON FOLD. You only need ONE.
And when you cut out the humongous sleeves, unless you have 60” wide fabric, you will have to open up your yardage, then fold that end to end, rather than selvedge to selvedge, and cut two that way. So don’t short yourself fabric. The pattern calls for 3 7/8 yds. Just get 4. Make it easy on yourself, just in case you make a mistake, or want to do more stuff with it, as in self fabric trims.
The sleeves call for a netting lining to help hold out all the floofiness. I tried doing this one other time and only lined them halfway but the ends kept wanting to roll up. This time I cut two layers of the wide netting, not the fine tulle stuff, top stitched it to the back of my sleeve fabric, then my layer of cotton lining, and sewed the sleeves together. I used a pair of thread nippers and trimmed off any of the netting I could get to inside the seams because you don’t want that stuff sticking out. It’s scratchy! But the beauty it gives those floofy sleeves is amazing. Later this year I’m hoping to take a class to make sleeve supports for these and my 1830s dresses, but in the meantime, this works. And netting is cheap too. Since it’s so wide, I bought one yard and was able to cut all four layers out of it.
I flatlined everything with brown cotton, then sewed my front plackets on first to the shirtwaist so they were lined up nicely. Then I pinned my side seams on me so they were roughly fitted and sewed them. I sewed the gathers on the body, and on the peplum, after sewing it together, then pulled them in to fit each other. Voila! Next up was the collar, which I just did the standing collar, not a high one because I have a short neck and high necks aren’t so attractive on me. Or maybe I’m not so attractive in them. This then gave me the opportunity to work on my lapels. I drew a pattern as wide as I could, cut it out of the aqua fabric, and lined the back with brown fabric to save on the aqua. I really would have loved to have really wide lapels but it wasn’t to be. Since this is handstitched on, maybe at some later date when I find more aqua taffeta I can remake them. Later I relocated the lapels to be part of the front plackets and liked that better. And the sleeves got attached! Yay, it’s almost done! 

One of my research photos showed some decorative buttons on the front and off I went in search of pretty buttons on etsy. I wanted dome shaped ones and came across these that were plastic but looked like glass and they were brown. They contrasted nicely on the aqua. 


Next up was the corselet. I had considered a belt but I hate making belts, and having to adjust the size all the time. A back-lacing corselet was perfect. *These are not a corset, or the Swiss waists worn earlier in the 1860s.* I made the shorter corselet and amazingly it helped distract your eye from that melted spot on my skirt. I used Truly Victorian #492, and made a matching belt of the dotty fabric, lining the back with brown cotton but also flatlining the fabric with the same. It has short steel boning in it, and I just made my boning channels with the same brown cotton. Here’s a sewing note on it: I think because I do some under stitching on a seam once I turned it right side out to help it stay flat, but I lose a bit of length for the bones, and it barely gave me enough seam allowance to turn under the bones when I finally closed it up. So be very careful when you sew those seams across the top to give yourself enough room to fit the bones in and turn under the seam at the bottom. The next one I made, I just sewed a 1/4-inch seam instead of 1/2 inch across the top and bottom.

With only a week left to finish this before leaving out of town where I’d be wearing it, I panicked a bit on how to get my grommets in for lacing in the back. Since it was my birthday, and I knew this wasn’t the only corselet, or corset for that matter, that I’d need a grommet setter for, I told hubby he was buying me one for my birthday. I bought it online from a company up in Los Angeles, Gold Star Tool, surprisingly near the Garment District. It was also recommended to me by a few others. https://goldstartool.com/Grommet-and-Snap-Press/  I bought the $69 one with one die set. If all you need is the small 00 size grommets that most of us use for corsets, that’s all you need. The photo with the arrows shows you the two die bits it comes with. You don’t need a cutter one because if you’re a costume maker, you know you never cut the fabric. You simply separate the threads with an awl and spread it to hold the grommets. 

The easiest thing I had for lacing mine was brown ribbon. I made it a bit long but it makes a pretty bow in back.
And finally, the accessories. I used an antique purse with a chatelaine I had to hang It from my waist, just like I saw in some 1890s photos. *Remember the earlier Fray-Check needed on my skirt? I think I’m going to have to Fray-Check all the dots on this fabric, because my purse and my sleeve both rubbed against those dots and frayed them. So, I have a big project coming up and probably need to buy a bigger bottle of Fray-Check. 

For my hat, I pulled out a boater with a black band I had, covered the crown with cream taffeta and added stuff. I saw lots of big bows, feathers, and many with a buckle or brooch in front.


So again, out of my fabric stash came this cream taffeta. The flowers came from Michael’s. The buckle was a cheap metal one off etsy, and the scruffy brown feathers came from a Paris flea market that I bought from while in Paris a few years ago.  
I cut a circle of taffeta slightly larger than the crown and roughly basted it over the top. Then I folded over a wider piece to go around the sides and roughly basted that on. I reuse my hats often so that makes it easier to retrim them.  I made large loops of the taffeta to put on the front.

I basted all my trims on, THREE TIMES! until I was happy with it. That’s one good reason why basting them on is good. 


See the bar pin on this lady’s collar, and the comb on the back of her hair? I did wear one of my bar pins with this, and bought a celluloid hair comb for the next time.


Everything was finished in time for my trip to Washington state and for the Port Townsend Victorian Festival that I met up with my friends from SITU, and the Puget Sound Costume Guild. We walked around town and had tea at the Commander's Beach House. *I also put on the fashion show there this year. More on that in another post.*


Back home this young lady has been patiently waiting for me to get back to work on my next project, which I already have started. Yes, it’s another 1890s blouse!


                                                                   ~~~Val~~~


Tuesday, March 7, 2017

“HISTORY TALKS” AT THE DAVIS-HORTON HOUSE

This last weekend I joined my friend Cindy for her clothing history presentation at the Davis-Horton House in downtown San Diego, across the street from the Horton Grand Hotel. She had been asked to do this for their History Talks lecture series, and she chose to do a timeline of dress and the understructures from 1800-1905.  She asked me to help her with the dresses and underpinnings, and talk about those. So I was her live mannequin.  This was written on the website for our presentation. 
        Changing Silhouettes Throughout the 19th Century: Clothing and Understructure. 
                      Presented by Cindy Piselli and Valarie LaBore 
The Gaslamp Quarter Historical Foundation is pleased to announce the return of it's popular "History Talks!" series in 2017. The first lecture will be Sunday, March 5th at 3pm at the Gaslamp Museum in the Davis-Horton House. Clothing experts, Cindy Piselli and Valarie LaBore will share their extensive knowledge on the clothing of the 19th century.
Cindy and Valarie are both members and past Presidents of the San Diego Costume Guild, as well as members of the Costumers Guild West. Cindy is also a member of the Victorian Roses Ladies Riding Society. Valarie has given a presentation on bloomer gowns at the annual ALHFAM conference in Williamsburg, VA. Cindy has co-lectured on fashion here in San Diego with author Garner Palenske, who wrote Wyatt Earp in San Diego. Both ladies have several years of experience producing and narrating historical fashion shows, and presenting lectures at events such as Costume College, and for various guilds and clubs.
Join us for an afternoon of fashion and history! Free for members, $5 general admission. RSVP by calling the Gaslamp Museum at 619-233-44692. http://gaslampfoundation.org/history-talks/ 
It was primarily a slideshow but we included visuals of dresses on mannequins, dresses on ourselves, and I showed samples of each of the underpinnings that she was talking about. We held it in the basement room of the historic house, and it was a nice cozy location, with about 20 people attending. I’d never been to this house before but had heard about its ghost tours, so I was excited to see the inside of it. It’s an 1850s Saltbox-style house, not a fancy decorated one but functional, and at one time was used as a hospital. More can be read about it on their website.  http://gaslampfoundation.org/the-davis-horton-house-1850/ 

I wore the earliest dress we had a sample of, my 1835 teal and cranberry Romantic Era dress. On one mannequin (which were supplied by the museum and were extremely tiny!) I put my 1860s white and blue floral lawn dress, over a hoop petticoat, which we showed off. Cindy wore her 1870s pink and grey plaid bustle dress, and on the other was my 1877 pink polka dot dress. Each had their appropriate supports under them. I brought samples of stays (which the wooden busk shocked many of them), corsets, chemises, drawers, combinations, petticoats, bustles, & bustle pads. I also gave them a little background on corsets, and that they weren't instruments of torture, no ribs were removed. You know, that garbage. One of my friends, Vicki, from my water aerobics class had attended so I invited her up to try on a lobster tail bustle. Then we showed how easy it is to sit down in it. The ladies were fascinated by this one and later some came up to also try it on. 

We’re starting to notice that many of the attendees to our fashion shows and presentations are fascinated by the underpinnings worn with the dresses, so we’ve started focusing a lot more on those. With having about 15 pieces of the different eras to show, it filled out Cindy’s presentation very well, and gave a good hands-on view of the actual pieces worn. I would have loved to try the hoop petticoat on someone but the poor mannequin wouldn’t have survived very well having it yanked on and off. If we’d had time, I probably would have tried putting a corset on someone too. That’s always fun!
                                                          ~~~~Val~~~~ 

Friday, February 24, 2017

2017 Port Townsend (WA) Victorian Heritage Festival

If you’ve ever been to the Victorian Festival in Port Townsend, or have heard about it, I wanted to tell you it’s going on again this year, after the former organizers retired, and new ones stepped in. It's a beautiful seaport town, right off the water, and near where the ferries run. 

The dates have changed, to April 1 and 2, and the website is up,  http://2017.vicfest.org/  which is still being worked on but has some pertinent information on it already. This year's theme, Victorian Dreams, takes you back to the 1890s, and Jules Verne, along with afternoon tea, demonstrations, lectures, and historic building tours. Last year I found a ghost in one. This is the information on the events but it's still being updated from last year.     http://2017.vicfest.org/events/
If this event sounds familiar, it’s because every year at this time I head up to WA to visit my Mom and attend the Festival to be in their fashion show. Last year I did my presentation on “Watches & How Women Wore Them”. This year I’m taking on an even bigger challenge, writing and organizing the fashion show, which is mostly a new group of people, and we’re in a new location, the Port Townsend American Legion Hall. Later that evening it will be transformed into the Victorian Ball room. It’s located just off Water Street, the main street of all the historical buildings, and where the Festival is normally put on.  This isn’t so much an outdoor street show but has presentations going on inside buildings.

This year one of the historic old buildings, the Hastings Building, will be hosting a marketplace/craft show. It’s been under renovation, and will soon to transformed into a new hotel.
Two fun places to visit & stay are The Palace Hotel, and The Bishop Victorian Hotel, which is where I’ll be staying while I’m there.
In the past, the fashion show was held at a local church farther up on the hill. This time we’re going to be right down in the middle of the action. The Legion Hall will be transformed three times into different event locations. My fashion show theme is “Victorians Dress for the Occasion”, and I’ll have models wearing daytime, evening, sports, military, and masquerade. Many of the models are coming from the Seattle and Puget Sound costume guilds, with a couple from the previous group in the past shows. With the help of my local contact and costume friend, Mara, we’re going to give these folks a great show and hope the word gets out that everyone needs to come to the Festival.
I’m hoping the tintype photographer is there again this year because he had a great set-up last year, and I loved the photo he took of me. He had really nice props and he changed them as needed, and helped pose me. 
Check back on the website in the next couple weeks for more information as it’s added. 

Saturday, February 18, 2017

1885 Gold & Black Brocade Evening Dress

 
Even with a couple small projects going, I was immediately distracted by this dress when I realized, finally, that I had found one that I could use the gold and black Chinese brocade my neighbor had given me. It had been brought from China by a friend of her’s years ago, and when she realized she’d never use it, lucky for me, she passed it onto me and said she knew I’d make something beautiful with it. But with only four yards it would have to be part of a dress, not the whole dress. At some point, the Squirrel in me wants to cut out any remaining gold flowers and stitch them along the bottom edges of the skirt. Stay tuned for that but not in the next couple weeks is it going to happen.
This 1885 dress fit the bill.  It was created by French designer, Emile Pingat, and held in the Philadelphia Museum of Art collection.  By enlarging the photo I was able to see what patterns I could use for it, which made it easier.

I chose Truly Victorian #462 (1883) Tail bodice ( with the short peplum) and Truly Victorian #263 (1887) Trained Skirt (the center design).


I whipped up the bodice very quickly and then put it on my dress form to work out how to do the brocade trims on it. Since my dress form tends to be bumpy in different places than me, I laid the pattern out flat and traced the lines that looked like the photo. Then I cut pattern pieces out of that, and laid them on the dress form. That seemed to look right. The top of the center portion slightly sticks up like a sail. I didn’t think the brocade and my black silk taffeta would have the body to do that so I needed to put some interfacing in it to hold it up. On the opposite side since the front placket overlaps the other side, I can’t just sew the brocade following the front lines, or it won’t come to that point at the top. 
The sleeves actually look more like a lace rather than the solid fabric down the front of the skirt. But I’m going with the brocade all over. I had an idea for the sleeves to do something like this blue bodice with solid black sleeves and a strip of brocade down it so it’s not completely the brocade.
But later I decided I wanted a little more continuity with the brocade, and cut it entirely out of that, adding a black taffeta cuff with a brocade tab on it. Right now the tab is just basted on, and I left a little tail sticking up at the top to match the front of the dress trim.
Once I got all those trim ideas out of the way, the rest of the dress went together fairly smoothly, with just the hem and the closures to sew in by hand. 
The first chance I have to wear this will be in the Riverside (CA) Dickens fashion show next Saturday, February 25. The theme is Victorian Dreams, so when I needed to come up with something for it, I decided to accessorize this dress for it. I chose Titania, Queen of the Fairies, from Shakespeare’s A Midsummer Night’s Dream. A few simple additions, like a long train of shimmery gold chiffon, a headdress made of Xmas gold ball decorations, and a simple beaded gold necklace are my finishing projects this week.

After reading a short description of the scene where the Queen is enchanted by the King to fall in love with the first person she sees, which btw is a donkey, I knew I had to have a donkey with me. Without having time to walk around toy stores for one, I found a small plush one that would do on Amazon. I would have liked it a little bigger to be seen better from the stage, but he’ll do. I love going for a few laughs.

**************************************** 
And of course I couldn't just be working on one dress all this time, right? You are correct. I suddenly decided I wanted to make a new sheer dress to walk around in during the Dickens Festival, since my Brocade dress isn't suitable for walking and dragging the long train in the streets. I had the fabric in my stash, and wanted to make this multi-tiered dress. 
I tried a new pattern for the bodice, Period Impressions #405, because it had the little peplum going all the way around it. But it was too large all over, & I ended up cutting out almost a new pattern to make it work. And wanting to cut my throat. I probably should have made it using McCalls #5132 and just doing a bit of altering. Next time for sure. 
I started it in a sewing workshop with Shelley Peters but only got as far as getting a fitted bodice before I remembered I needed to get that Brocade dress done. So this is as far as it got. And I got all the tiers of the skirt are torn to the lengths I need to start the skirt. Since we all know that's not going to be done in time, I'm now considering wearing one of my earlier 1830s day dresses to walk the streets in. 
But then after having a little chat with Mara up in Washington about the Victorian Festival on April 1, and figuring out what to wear in that fashion show, and on the streets, she convinced me to make an 1890s skirt and blouse. I had just the fabric for it; a brown polyester with dots of brown, cream & aqua.  I had lots of it, cheap, and an easy pattern, Truly Victorian #494, and #291 walking skirt. I have a piece of aqua silk taffeta I want to try and run down either sides of the front closure, and add a bow on the back of the neck, like they did in the 90s. I don’t have much of it so I have to be careful.
I got the skirt almost done, but had a little oops with the iron. Whoever heard of polyester not melting when it’s on high heat with steam, but then melts when it’s barely warm? What’s up with that!! I’m wasting a day just doing repairs on it now. And with a week left until Dickens, it gets to simmer a little longer too. 

Yep, squirrels are running all over here. Stay tuned for further adventures.  


                                                            ~~~Val~~~