

*This was a blog post I'd written back in Aug 2013 but never finished. So I've updated it to add here.*
 When I first started costuming in 2005 I was one of those who just wanted to start making the dresses and was impatient to get them going. It was impressed on me that I really needed to make the corset first. But I was stubborn. However on a visit to the home of the McNaughton sisters (of Truly Victorian patterns) to pick up my first patterns from them, Heather told me they had some corsets they'd made for sale. *Now don't get excited, this was years ago and they don't do that anymore.* Heather tried a couple on me and I chose a pink coutil one. So now I was really ready to make my dresses. Later on Heather had to deal with me resisting her suggestion that I flat-line the bodice in a cotton dress because I didn't know what it was, or its purpose. And don't blame her; she really tried to convince me. And later it sunk in after I saw the bagginess of the fabric on my bodice. Flat-lining gives fabric support and smoothness. Even if you don't understand it, trust me. I highly recommend it. It's period correct and you will be sooo much happier in how your bodice looks.
I wore that corset for a couple years and made my dresses but kept noticing it would poke me in the underarms when I sat, or rode up by the end of the day. When I was finally able to afford a custom-made one by Shelley Peters of the Kansas Mercantile, she said because of my short waist a custom made one would be much more comfortable. And it was. That one was made using the Laughing Moon pattern, with a white floral brocade coutil. I wore that puppy to death for about five years.
 In the meantime I wanted to make some Regency dresses and tried making a Regency corset with a wooden busk in a class at Costume College. It used cording instead of bones and really was fun to make and worked great. But I didn't finish it in class, and even though we were promised emailed instructions to finish it, they were never sent. So I bought the Mantua Maker's pattern for the same corset and used those instructions to finally finish it. I don't have a photo of it though.
 A few years later when I tried 18th century dresses I made a Georgian corset using Butterick's #4484 pattern out of a powder blue silk taffeta. I liked it because it gave you the option of lacing both front and back. Since I almost always have to get into my corsets and costumes by myself any of the seamed front corsets made it really hard to wear them. This one doesn't have many bones in it so it doesn't give as much support as I'd like but it gave me the right silhouette for my 1770s gowns. The shoulder straps kept falling off my shoulders though and made me very irritable. At one point I cut them off.

 A couple years later I made the JP Ryan pattern, which also has a laced front option. It was a much better fit. And this one didn't have those shoulder straps to fall off me all the time.
 As I've been typing this and digging out photos to include here I'm starting to realize that I've actually made more corsets than I thought. Three years ago I made a 1903 S-bend corset using Truly Victorian's new Edwardian corset ##E01 during an online class with Jennifer Rosbrugh of Historical Sewing.
 It gives an appearance of you leaning forward by a fuller bust area with bust pads, which is then covered by a fluffy corset cover, and a small bum pad in the back. It was very comfortable, much more so than my Victorian one.

 Having that experience under my belt, I tackled a 1911 long-line corset that my friend Cat had graded up for me from Corsets & Crinolines by Norah Waugh. I bought a pink striped canvas fabric in the Garment District and flat-lined it with twill.
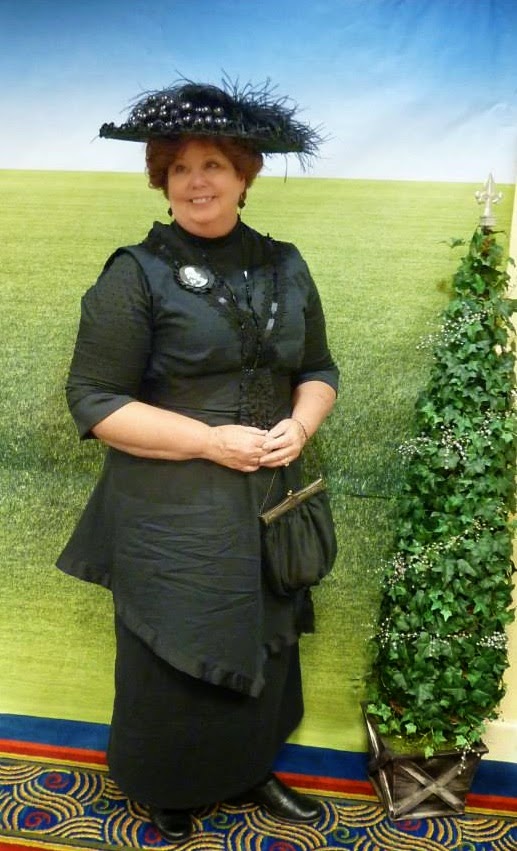
 I've yet to wear this one but I'm now ready to make my 'Teens era dresses. Downton Abbey, here I come!

 **January 2015-- Update 1 1/2 years later**
Finally I'm making my 'Teens era dresses and needed to use this corset. but I found it wasn't doing anything for my body. So at the recommendation of Shelley Peters, I added more boning to it. It had minimal bones when I made it. 16 bones later it finally felt like it was doing what it was supposed to be doing, making me svelte. Ok, pushing the fluff around to a smoother line. I was able to wear a couple dresses that I had made in the interim and now am excited to go on to the next ones.
I saved this photo of another corset someone had made where she sewed strips of "Shabby Chic" fabric together and would LOVE to make one like it. This is the one that got me going on making one.
 By now my poor five year old Victorian corset was too big on my hips and wasn't doing me any favors. So when Shelley Peters asked me to host one of her Historical Sewing Workshops at my house, I knew this was a good chance to make a new 1880s one to replace mine. Truly Victorian had their own pattern #110, and it gave a much better "hip spring" to it. I've heard that term a lot, not really sure what it means, bu it know it refers to the shape of the curve over the hips.
%2BLate%2BVictorian%2Bcorset.png)

 Considering I wear Victorian dress more often than anything else, I'm surprised it took me so long to make one of these corsets. And once again having the experience under my belt, I had no qualms trying a second one. It was scary but not as bad as I thought. And having someone who knows how to make them to help you along is a great advantage.
**EDITED TO ADD**
Omg, I forgot to add my Regency bodiced petticoat! I made this because I can actually get into it and almost tighten it up instead of the Regency corset, which I hardly ever get to wear because of that. I used my LaMode Bagatelle pattern's drawstring bodice portion, slightly lowered the neckline so it wouldn't show above my dress neckline. I did a drawstring around the neck and underbust. With the bones on the sides of the bust portion and pulling the ties very tightly it totally gives me the great "shelf" you need for Regency but sadly does not flatten the midriff. :( I added a ruffle to the bottom hem to fluff out my dress but it really needs to be a bit longer.


 ~~Val~~

I wore that corset for a couple years and made my dresses but kept noticing it would poke me in the underarms when I sat, or rode up by the end of the day. When I was finally able to afford a custom-made one by Shelley Peters of the Kansas Mercantile, she said because of my short waist a custom made one would be much more comfortable. And it was. That one was made using the Laughing Moon pattern, with a white floral brocade coutil. I wore that puppy to death for about five years.
Finally I'm making my 'Teens era dresses and needed to use this corset. but I found it wasn't doing anything for my body. So at the recommendation of Shelley Peters, I added more boning to it. It had minimal bones when I made it. 16 bones later it finally felt like it was doing what it was supposed to be doing, making me svelte. Ok, pushing the fluff around to a smoother line. I was able to wear a couple dresses that I had made in the interim and now am excited to go on to the next ones.
I saved this photo of another corset someone had made where she sewed strips of "Shabby Chic" fabric together and would LOVE to make one like it. This is the one that got me going on making one.
**EDITED TO ADD**
Omg, I forgot to add my Regency bodiced petticoat! I made this because I can actually get into it and almost tighten it up instead of the Regency corset, which I hardly ever get to wear because of that. I used my LaMode Bagatelle pattern's drawstring bodice portion, slightly lowered the neckline so it wouldn't show above my dress neckline. I did a drawstring around the neck and underbust. With the bones on the sides of the bust portion and pulling the ties very tightly it totally gives me the great "shelf" you need for Regency but sadly does not flatten the midriff. :( I added a ruffle to the bottom hem to fluff out my dress but it really needs to be a bit longer.


.jpg)