This is a photo diary of my costuming "travels"; where I've learned and struggled to make historical costumes for myself. They're not always pretty, but always fun, most of the time. And I want to share with others what I learn along the way. **You can find me on Facebook, https://www.facebook.com/Time-Traveling-in-Costume-640703499399817/ or have my posts delivered to your email by signing up at the lower part of the right column.**


About Me

My photo
HI, my name is Val. I'm a member of Costumer's Guild West in Los Angeles, Dean of 2018 & 2024 Costume College; Past President of the San Diego Costume Guild, member of Orange County Costume Guild, and a representative of the San Diego History Center. I also put on historical fashion shows for various groups. I make my own historical costumes but don't sell any unless I get tired of one.The eras I've made so far are 1770 up to 1918. My favorite is the 1880s bustle.

Followers

Wednesday, February 21, 2024

ANOTHER DRESS OUT OF THE “BLACK HOLE” THAT IS MY CLOSET: 1860s Wrapper

A couple weeks ago, while discussing some possible outfits for the Port Townsend Victorian Festival’s fashion show, we thought adding tea gowns and wrappers to the line-up would be a good fit for the House & Home theme. And some of us could wear two outfits because we could just throw the wrapper over our underpinnings and do a quick change into our dresses.

I remarked that I had three of them from different time periods: 1810/ Regency, 1860s, and 1890s. One of the ladies said she had an 1890s so I decided I could wear my 1860s one, which I hadn’t even worn yet. I had made it back in 2015 using Kay Fig’s Wrapper # KF611 (1855-1865), and bought a rust colored fabric, that was a birthday present from my hubby from Rosie’s Calico Cupboard in San Diego.


Fast forward a couple weeks, and I was looking through my album of costumes for a photo of mine and couldn’t find it. So, then I started digging around in my blog folders. Nothing. Then checked my online blog and couldn’t find any mention of it either.    

FINALLY, I found a folder within a folder on wrappers I’d made, and had some incomplete photos of my 1860s dress, with no sleeves of course. I swore I remembered putting the sleeves on. So, I went into my “Black Hole closet” and pulled it out. Yup, it had sleeves! But it still needed buttons, and hemming. Of course it needed hemming. Why am I not surprised?

But other than that, it could be finished rather quickly. 

When I first started this project, I collected some photos of extant wrappers as a guide to what I would like. This one is from All the Pretty Dresses blog.


I found a couple others that had self-fabric tie belts in the front and liked that so that was why I chose the Kay Fig pattern. I’d also seen it made up and liked it.


Going back to my work-in-progress photos, I remembered having trouble understanding the directions and had to ask Kay Gnagey a lot of questions about them.


My email to Kay Gnagy--“I keep re-reading the instructions but once it tells you to sew the front and back bodices together at the shoulders, page 32, step 26, it goes on to the neckline, then the armseye piping, then the sleeves. It says nothing about what to do with that open flap on the bodice and skirt.

I ended up tucking the outside edge down on both and stitching it, then topstitched the skirt portion closed from the waist down. So, it’s still an open flap on the pleated portion of the bodice.”

Response from Kay:

I think we have narrowed down the spot that can be misunderstood and will change that to this. 
Short summary:
1) do not sew the shoulder seams until the VERY end (yes, I know it is tempting, but don't)
2) the neck edge of the FRONT lining must be finished independently from the front panel (best before front panel is added)
3) sew front panel VERTICALLY (top to bottom) - right sides to right side of bodice side and skirt (this is the "French door" look people referred to)
4) you can pleat or gather that front panel to fit your lining shoulder length, with a nice full pleat towards the shoulder, pin onto shoulder edge of front lining.
OK ------
NOW you can sew that shoulder seam!”

That was enough to help me finish the front on it and get to this point. I think it then sat in my closet for a year or so until I thought I was going to need it, and I sewed the sleeves on. But in the end, I didn’t need it at that time.


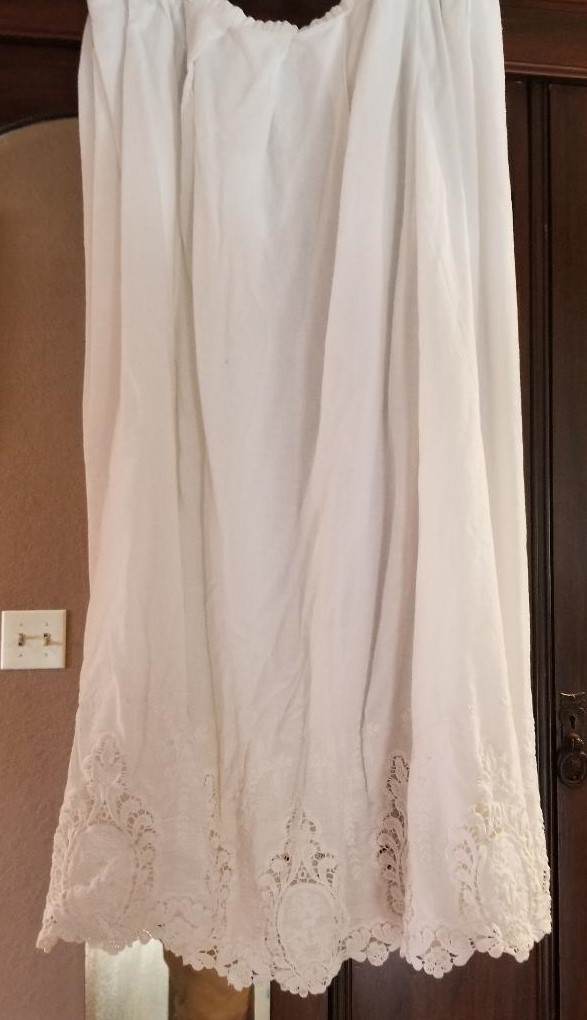
I had also saved a photo of a wrapper petticoat from All the Pretty Dresses blog, and have a pretty one I’ll use with mine, but I’ll be wearing just a small hoop under it for the fashion show, so I don’t have to bring two with me. I plan on wearing the skirt portion open in front to show off my pretty white antique petticoat for a similar look like the Kay Fig pattern. Or possibly my other one that I made from pre-made broderie anglaise fabric.


With this being so close to calling it done, I needed to find some buttons, and lots of them, about 15, so I can finish that part. That could have actually been one of the reasons it got stalled on finishing last time.

Today I did some shopping on etsy for those. I found these wood ones, 25 for $6.99. They look like they have a slight orange tint, and are two-holers which I prefer, and are more historically accurate. Maybe not the dots around the edge but these are only 5/8” and doubt that will show up much.

Since I’m going to be wearing this first for the fashion show, I need to be able to do a quick change into my next outfit. I haven’t decided on which wig to wear yet, but it will be one I can wear with this and the 1884 dress, which will be covered with a bonnet. While wearing my wrapper, I’m going to put a black lace day cap I have on and can then either remove it for my next outfit or see if it works under my bonnet.


Now it’s time to pick up my dress form, stand it up on top of my sewing table and mark the hems on both this, and my solid blue skirt for my 1887 Autumn Plaid dress, which I previously wrote about. As soon as my wooden buttons arrive, I can start making the buttonholes and sewing the buttons on. Once again, things are moving in baby steps. And that’s ok. Soon I can wear them.


Saturday, February 17, 2024

1887 Autumn Plaid Bustle -3 Years in the Making

Well, this is embarrassing. I didn’t realize that it has taken me almost 3 years to finally finish this dress. And the skirt still needs hemming. If you’d like to read the beginnings & construction of it, this was my post from April 2021. It’s been hibernating since then.  https://timetravelingincostume.blogspot.com/2021/04/getting-back-to-sewing1887-plaid-bustle.html

One of my excuses is I was also working on another similar blue plaid dress about the same time. Whichever one called to me got worked on. My other excuse is good ole procrastination and the Squirrel! -- Ooh, I need a fantasy Regency dress for Costume College! And that Disney Haunted Mansion dress for Halloween, which isn’t finished yet but now has a due date for July. So yeah, those are my excuses. Its been sitting in bits and pieces in my closet and on my sewing table, so I always knew it was watching me.

With the Port Townsend (WA) Victorian Festival fashion show coming up in April, I wanted to finish both the plaid dresses for it. So, I did a little work on them when I could, along with putting together our Costume College event in July. I’ve had to juggle everything depending on what needed working on.

Somewhere in between the last couple years, the bodice fit me, and then it didn’t. I gained a few pounds over the recent holidays and those are going down. But when I tried it on last week, the neck wouldn’t close. What the..???  I don’t know what happened there. It was so long ago, I don’t remember how it was when I first tried it on, and of course it was fine on my dress form. But I didn’t feel like ripping the whole thing out and adding something somewhere. So, I’m going to just let the neckline lay open like a tiny fold down collar. Thankfully I hadn’t done my buttonholes at that time.


In a spurt of enthusiasm a while back, I started trimming the bodice and skirt, using a narrow red braid. It tied the red in with the plaid very nicely. I sewed it around the lapels, the cuffs, and around the hem of the overskirt.


Looking at this now, I’m starting to think I’d like a double row of red braid. So, I’m going to see if I can order some more. I think it would stand out more, especially on the overskirt. Some of my friends have agreed with me. (More has been ordered and is on its way).

Another idea I had was to put a watch pocket on the outside of the bodice, and I’d marked it in black thread so I’d know where it would go. Except when it was time to do that, I realized it was on the right side of the bodice, when it should have been on the left. That’s partly because of being right-handed, its easier to reach across for the watch but was also historically correct. In looking at all the antique photos I have of ladies' watches and watchchains, I could only find one on the right side in one photo. I bet she was a lefty. So, I lined up my markings to the other side, dig out my watch, traced a half-dome shape around it, and cut my fabric. I cut two, sewed them right sides together, leaving a small opening on the side, turned it right-side out and stitched the opening closed. Then I hand-sewed it to my bodice. The watch was a tight fit, but it won’t fall out.


After publishing this, I happened to turn my dress form around to take a photo of the back, and am now thinking it needs "something" on the peplum. So I'll be thinking about that for a while. 

When I started thinking about a hat, here’s something I haven’t worn in a long time; my gold and burnt orange hat that sits on the back of my head, and I think will be perfect for my Autumn Plaid dress. And I have my pretty amber earrings from LadyDetalle. 
 

PS. Wait until you see what else came out of my “Black Hole” sewing room closet recently.