


A year ago in May of 2023, I had to think of what the
theme for the Gala at Costume College was going to be. For those that don’t
know, I was the Assistant Dean for that year’s event, and would be Dean in
2024. So we had to plan way ahead for what our event themes will be to set them
in progress. I didn’t hesitate when I decided on a Bridgerton-theme for it. I
thought it would be a lot of fun to play with, and there are so many Regency
events and fandom going on right now. I immediately started planning what my
dress would look like. I wanted a gaudy or colorful looking fabric but also
didn’t want to spend a lot of money on it because I might not ever wear it
again, since it wasn’t historical.
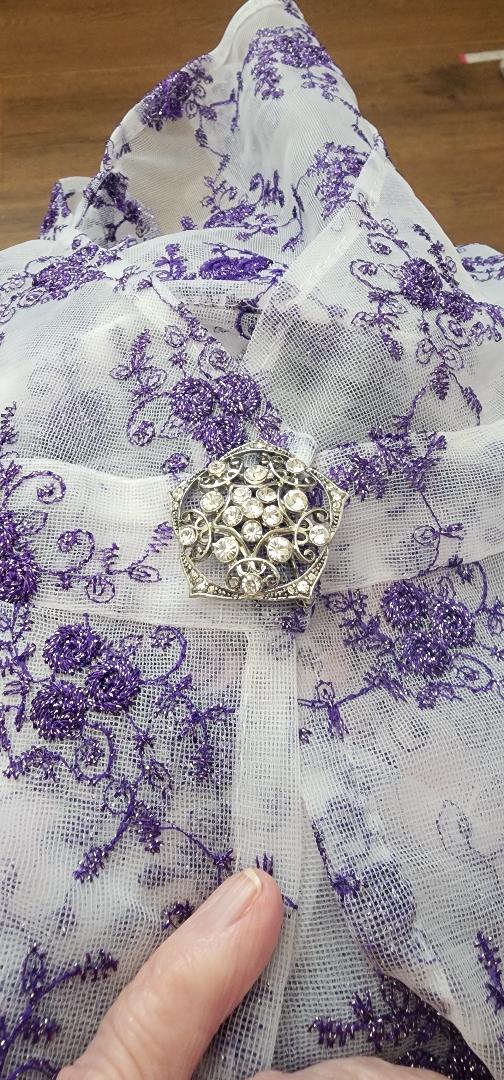
I picked a color I liked from one of the dresses from the
Bridgerton series Season 1, it being a sheer purple with large flowers
embroidered on it. So I started shopping on etsy and found an embroidered
netting I liked on sale for $4.79 a yard. It was 59” wide and coming from
China. I didn’t really pay attention to the fabric type but knew it would be polyester
at least. I was in no rush, but it didn’t take long to arrive. My first
impression was the netting was plasticky but the embroidery was nice. I found
out later it was nylon. And of course I would need to line it with cotton.


The more I thought about this dress, the more I realized it was going to be hot. Too hot for Southern CA summers. I spent a few months thinking this through. In the meantime, I had to decide on my pattern. I bought the Nehelenia pattern NP403 for a Regency dress online since I liked the front crossover bodice and pretty lace insert it had. It only came as a digital download but my plan was just to print the bodice portion, and use the skirt pattern from another printed Regency one. I ended up using Simplicty 8941 but am having to take in a lot of the fabric because it has more fullness than what I want. But at least it’s a tissue pattern that’s easier to use.


So after months of thinking about my dress, I decided to just make a white dress using some cotton sateen I had, and then make the embroidered portion a separate dress that would go over it, like an open-robe, and the white dress could be worn on other occasions. In looking at Regency fashion plates, it looks like the 1806-1809 time period would work for it.


I was able to cut out a muslin for the bodice at a sewing workshop and I was right, other than needing to add a 1/2 inch to the seam allowances to enlarge it, the front opening and shoulder width was perfect for my short shoulders and wouldn’t be falling off my arms like previous patterns I’d used. My sleeves will be a three-quarter length, as befits my age.
After cutting out the cotton sateen and the embroidered fabric for the bodice, I sewed those seams together. Instead of machine sewing the neckline opening I sewed those seams under by hand. The white dress has a back closure and a closed front with the lace insert also sewn to it. But I plan to make the over-dress with a front opening to make it easier to get in and out of, and it won’t have the lace insert, so basically, it’s like an open-robe. And why cover up the pretty lace?


Next plans are blinging it up for the Bridgerton-look. I saved some photos from the TV series of florals and ribbon trims I liked on a couple dresses that go under the bust. I won’t make that decision until the dress is constructed. But it’s also part of my plans for my headpiece.


I liked the lace headpiece that one actor wore and tried to think of some way to add flowers to it, because I want to look like a flower garden. But it seemed like a lot of work, and I might not have the time. Then I saw this headband with flowers on it, and thought, aha! that I can do. Another idea came from the floral necklace around the one actor’s neck that could be filled out with flowers on a headpiece.


.jpg)

It took me two days to finally cut out all three pattern pieces. I cut out the pattern size according to the pattern directions, also knowing it would have lots of ease. And as I expected, it was a LOT of fabric! Since I can’t stand for very long, I didn’t want to try pinning it on my dress form and keep trying to fit it on there and adjust it. So yesterday I decided to hand baste just the front and back pieces of my white cotton sateen together, and not using the two side panels, which were just as wide as the front and back. I didn’t want to machine baste it because this fabric tends to get thread pulls. And it would be much easier and quicker to take it out if I needed to adjust the size. I did a gathering stitch along the top edges so I could be sure it wouldn’t be too fluffy in the front the “pregnant-look”, but would have a nice fullness in the center back. I pulled it on today and pinned it under my bust and sides, and I’m quite happy with the amount of fabric I have. So, only using the front and back pieces. Unfortunately there’s that leftover side panel, and of my floral over-dress fabric. But they’re just large panels, and usable for something else. At least, I’ve made progress, and after I’ve recovered from my knee surgery next week, I can sit and sew these on my sewing machine.
I did some testing of whether gathering or pleating the skirt
into the waistband would work best. Pleating was better on the cotton sateen. Not
so sure about the nylon overskirt. It’s a bit fluffy and I’m wondering if I
should take out some of the extra fabric rather than it being as fluffy as the
under dress. I’ll try them on together today but for now it’s just the skirt
portion. I’m not attaching the bodices until the skirts are right.
-----------------------------------------------------------------------------------------
My plans of getting back to sewing a week after my knee
replacement surgery was a fantasy. It actually took me more than 3 weeks before
I was able to walk that far in my house to my sewing room and sit down for very
long. I decided hand-sewing was probably better for me right now. Attaching the
overdress together needed to hand baste everything first because it spits out
my pins in about 3 seconds. Because of
its sheerness, I attached a facing to the waistband to give it some body and so
the seam allowances didn’t show through it.


After I made the sleeves for the underdress I was going
to see how it would look for the overdress to NOT have sleeves, similar to an
open robe. But then I looked at a previous open robe I’d made for CoCo back in 2008 and that made me
decide that no, I would not make it like a 1795 open robe since this is
supposed to be a later style. I want it to look like one piece of fabric with
embroidery on it.


Now only one week before Costume College, I was in the final stages of finishing everything. My floral hat was the last thing I worked on. I made a base of buckram and covered it with my white cotton sateen. Then hot-glued my flowers and some ribbon leaves to it. This was a quick and dirty hat because I don’t expect to wear it again. After playing with a few different trims, I decided to just go with a tulle ruffle around the base. I couldn’t find any pearl picks to add to it, so that was it. I tacked on a couple hair clips to it and it’s done.


No comments:
Post a Comment
ALL COMMENTS ARE HELD IN MODERATION UNTIL I APPROVE THEM TO SAVE EVERYONE FROM SPAMMERS. But I would love to hear from my readers!