With four days left until Dickens, my purple dress is done
minus a button or so. But over the weekend I found out the temperature that day
was predicted to be 88d, although it has since dropped to 83d but still,
wearing a dark purple faux silk taffeta dress? Since I don’t behave very well
when it’s hot, I stayed awake one night dreading wearing it and becoming a
sodden mess by the time the fashion show began.
So a decision was made that I would wear my blue and white
cotton lawn dress during the day, and changing into the purple dress for the
fashion show. Good thing is at least it won’t get wrinkled.
But I never got around to finishing a bonnet for it. I was
just wearing a lacy day cap with it. And the bonnet I was working on I loaned
out to a friend who is also going to Dickens. So I dug through the bonnet stash
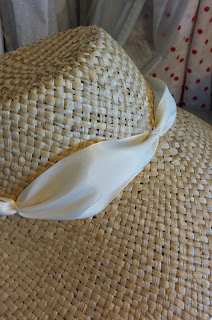
of unfinished forms, and came up with this one I’d bought off a street corner
in the LA Garment District. Probably paid about $3.50 for it.
This was going to have to be a quick and dirty bonnet. I
normally hand-tack my trims because I can remove them easily later to do a
different color or design. But because of time constraints and being cheapo, I
was using hot glue.
It went downhill from there.
I began to remove the grosgrain around the brim edge and the
bonnet literally began to disintegrate before my eyes. It did have a very thin
piece of plastic “wire” sewn around the brim, thank goodness for that. But even
it wasn’t being held on very well. The loosely woven straw had nothing left to
hold it together. It was dry and brittle, and pieces were falling on my lap.
First thing I did was grab my bottle of Stiffy liquid and pour liberally around
the edges and on the lower back edge of the crown which pretty much had
disappeared into a pile of little bits. After that finally dried. I tried to
machine sewn the white grosgrain ribbon around the edge. But it was too brittle
and any bending would cause it to break. Plan B: hand-baste the ribbon on. It looked pretty rough. I did a little touching up with hot glue to the edges
so it would lay flat and stay attached. Then to cover the inside of the ribbon I
glued some cotton crochet lace edging on.
I looked at some 1860s bonnets on Pinterest for some ideas
of trimming, and came up with doing some gathered loops around the crown. I
tied it in bunches with thread, and then tacked it to the bonnet. No glue.
~~Val~~


No comments:
Post a Comment
ALL COMMENTS ARE HELD IN MODERATION UNTIL I APPROVE THEM TO SAVE EVERYONE FROM SPAMMERS. But I would love to hear from my readers!