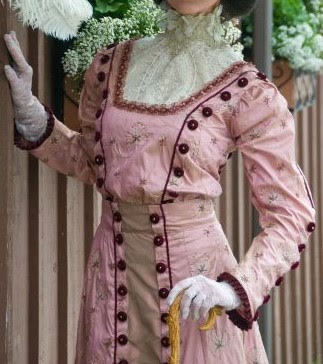
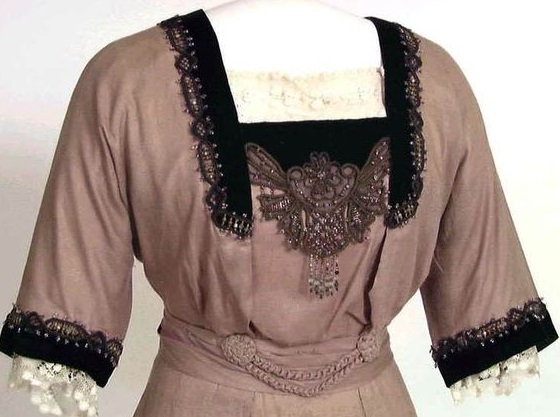
Over a year ago, in May 2023, I started the bodice for a 1911 dress using a very lightweight blue cotton voile fabric with embroidered appliques running along both sides of the selvedge. Part 1 of this post was written then.
PART 1
For the bodice I started with the Truly Victorian 1911 bodice, TVE
45, that I cut out at Shelley Peters' workshop. With the fabric embroidered on both sides of the selvedge, I had to cut
parts of that to make the trim on the sleeves, and then sewed rows of it onto
the center piece to make it look like a blouse. I added one row to the back
piece for a nice visual. I was going to take the side seams in because it’s just
too wide on me. I guess I overestimated my own hip size.
One of my ideas is to make the skirt with the
embroidery going down one side of it (I ended up not having enough fabric to do that), and also a white lace guimpe to wear
under the blouse. And I'm thinking of adding white cuffs to finish off the
sleeves.
I tried it on this morning, and the
shoulders were falling off my shoulders. So overnight my brain had come up with
a solution: make the center panel narrower. Then I'll pin it on me to get a
better fit. I can't remember what I did with the first one I made years ago. I
just need to take out the stitching there, and probably then don't have to take
in the sides of the blouse.
(I swear my dress form has football
shoulders.)
Next day: I've been
making way too much work trying to make this 1911 bodice fit me better. At
first I thought I'd just take in the sides. But as mentioned yesterday, I
thought maybe just making the centerpiece narrower might work better. Except
after ripping those out and pinning them on like that, the shoulders were
falling even more off me. ??
Back to the drawing
board this morning, and after looking at versions my friends, Mara, Sandra, and
of course the creator, Heather, made, I think part of my problem is the centerpiece
was too low on me. Mine was just above the bustline, and theirs are up closer
to their necks. I’m short-waisted & short-shouldered, so that might be part
of my problem. But I swear the previous one I made DID fit me.
So I'll be putting
the centerpieces back on their original size but a bit higher, and just take in
the sides as planned. These were versions of the pattern that my friends made with it.
6-10-23 Today I
basted the center panels back in full size and raised both front and back up
2”. The shoulders are still falling off me. And I’m back to the bottom being
too wide which I’ll need to pin on me to take that out. Intuitively, I feel
like I should make the panels narrower, at least at the top because it does
flare out there. These two photos show my first and my second fitting after narrowing the center which pulled the shoulders up higher.
And if you're wondering why I didn't make a muslin before
sewing it, I actually did with the first one years ago. I never actually wore
it, just put it on to make sure it fit. I don't remember the shoulder issue
though and I don't have it anymore to try it again. I even double-checked my measurements,
and I used the pattern one size smaller than it indicated to use.
I did a
search for this pattern to see if I could find other photos of it made up, or
other people having made it. One of the blogs I follow quite a lot, "Its All
Frosting", wrote about the exact same issue in her post and the solution she
came up with, which was widening her panels. ??? This is driving me CA-RAZY!
I think I’m
going to go with half her idea and do the panel less angled.
https://itsallfrosting.wordpress.com/2018/05/25/1915-picnic-dress-part-ii-bodice/ From her post: “I
endeavored to fix things first by altering the shape of the front and back
panels to be wider and less angled. I like the angled look in general, but here
it was not only causing the above-mentioned fit issues, but also reducing the
amount of visible space available for my lace bodice insert, which I’d intended
to show off. Making the panels wider gave me more space, and making the sides
straighter kept the neckline stable. I also raised both panels up several
inches– the front for modesty’s sake and the back to keep the neckline where it
belonged. The photos below
show the difference in the neckline shape– I’d already widened the front panel
and raised it up in the left photo, but the low back still let the sides fall
towards the shoulder and you can see how the bust is pulling oddly (it’s more
obvious when worn– think how much worse it would be with a lower neckline!).
The photo on the right shows the fixed version.”

To give myself a break from all this angst, I started saving
inspirational photos of different ways to trim the bodice. There were so many
ideas that I decided to make multiple versions and specifically an all-white
dress with lots of lace.
So far these are the three fabrics I’ll be making mine with.
Look at how many ideas I found! I noticed a lot of the
dresses use buttons as trim on the front, so I plan on doing the same.


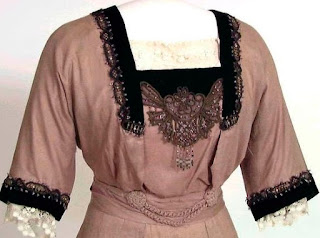
I even came across this photo showing a very fancy version
that could be made using this pattern. I need to keep this in mind next time I
want to make something dressy for the 1912 Titanic era.

I want to have a belt on mine so I collected some photo
ideas of a belt I could make for it, which I plan to do from the dress fabric.
Now here I am in February 2024 and the bodice was finally
finished but I had to set it aside for finishing some projects for the Port
Townsend Victorian Festival fashion show in April. See Part 2- The Skirt.

PART 2- The Skirt
In May 2024 I had my knee replacement surgery and lost two
months of sewing where I couldn’t even get to my sewing room. When I was able
to get there my original plan in July was to get my skirt at least started
because how hard can a skirt be to sew? I wanted to wear the entire outfit to
an afternoon tea on July 27, the week after Costume College. But I didn’t get finished with everything I
needed to get done for the convention on July 18, so my next idea was to make
it in the four days after I got home. But exhaustion and reality got the better
of me and I came up with an alternative outfit to wear to the tea. I pulled out a black polka dotted skirt and
a white blouse I’d made and added an antique Edwardian lace jacket to it, so my
stress level dropped.
I had already tried making the matching narrow panel skirt
that Truly Victorian has for the blouse, but I didn’t like how it looked on me.
TV E30 was a bit too narrow, and the high waist wasn’t working with my short
waist.
I
started looking for an A-line skirt pattern so that I could get this looser
look.

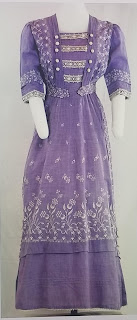
The two patterns I had, Laughing Moon 104 and Butterick
6610, both 1910-era dresses, looked like they might work. But my Laughing Moon
pattern wasn’t big enough, so I went with the Butterick. And of course the
photo is deceiving because the model doesn’t have hips. And I do. *More on that
in the construction portion.

I also want to make a guimpe, or lace under-blouse for this,
using Wearing History’s 1910 guimpe pattern. I’m not sure when I would get
around doing that but then I heard from some friends on the east coast about a
stretchy lace blouse they were all buying on Amazon, and even though its
stretch, it was also fitting the larger ladies. I was told to get the largest
size possible, 3X, because this is an Asian version, and they always run small.
And even better, it was only $26. I think it’s well made and looks nice under
my blouse. It may look a little yellowish in the photo but it’s over a
yellowish dress form. It’s definitely a white-white. I’m hoping it won’t be too
hot when I want to wear this but if it is, I’ll just go without.
Amazon lacy blouse


Now onto the battle with my skirt. I was also inspired by
the front panels that “It’s All About Frosting” had added to her skirt. I drafted
my own pattern for that, which was just long rectangles and a sharp angle on
two of them. When I pinned the front panel of my skirt to my dress from and
pinned those on to see what it looked like I was very happy with them. Except
when I laid the fabric out flat to make sure the front panels were straight, I
suddenly had a problem. I was going to sew the sides of those panels into the
side seams of the skirt. But because it was an A-line skirt, it angled out and
the side panels went all catty-wampus. Because of the width of my hips, the flare
starting at my hips made the bottom really wide.
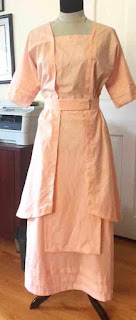
I couldn’t figure out how her peach dress had its panels
sewn on because there wasn’t a photo showing the back or sides. Then I started
reading more on her blog, and found it was actually an overskirt that was round
in the back and brought forward, when I thought they were just separate panels.
So it’s not attached to the skirt.
https://itsallfrosting.wordpress.com/2018/05/29/1915-picnic-dress-part-iii-skirt/
I don’t have any more fabric that I
can do the same with. So my alternative is to cut the skirt narrower so I can
get the panels into the side seams. I’ll probably pull that Laughing Moon
pattern back out and use it for the line of the skirt. OR I may just follow her example, and let the
panels hang loose which means they’ll be flapping in the wind.
And now my dress has a new “must need
by” date. I’m going to wear it in a fashion show in October at the Fred Harvey
Historical Museum in Perris, CA as part of an afternoon tea fundraiser. The
next photos will be of when I wear it.