This is a photo diary of my costuming "travels"; where I've learned and struggled to make historical costumes for myself. They're not always pretty, but always fun, most of the time. And I want to share with others what I learn along the way. **You can find me on Facebook, https://www.facebook.com/Time-Traveling-in-Costume-640703499399817/ or have my posts delivered to your email by signing up at the lower part of the right column.**


About Me

My photo
HI, my name is Val. I'm a member of Costumer's Guild West in Los Angeles, Dean of 2018 & 2024 Costume College; Past President of the San Diego Costume Guild, and a representative of the San Diego History Center. I also put on historical fashion shows for various groups. I make my own historical costumes but don't sell any unless I get tired of one.The eras I've made so far are 1770 up to 1918. My favorite is the 1880s bustle.

Followers

Showing posts with label Assembly Line Sewing. Show all posts

Saturday, August 29, 2020

BEGINNING STAGES OF MY 1830s PROJECT FOR 2020

 What do you do when you don’t feel like sewing, or have any enthusiasm to even try?

You plan.  So, I’m just going to show you some pretty pictures and fabrics, and that will have to suffice for now. Who knows, it may inspire me to do something. No promises but maybe some baby steps.

While my 1860s Project has fizzled (in truth, I am doing some cartridge pleating on the 3 skirts but haphazardly), I went forward on planning my 1830s Project of cutting and sewing 3-4-5, maybe 6, at a time. I’m undecided at this point which of my plaid silk taffetas I want to attack first, so it may just be 4.

First thing I did was gather all my dress photos that I wanted to make and decided what style to do. I’ve done about 4 of the pleated front bodices, so I want to try a crossover style, and a V-neck style. I’m a little tired of the off-the-shoulder styles. AND I want to be able to close them IN FRONT!!


Oh heck, let’s just throw in a mourning dress, and maybe an archery dress, although I don’t do archery but I can carry an arrow around with me.

And trust me, I have enough fabric in my stash, including some solids, to make all these plus a few more.


It’s the necklines that are going to confound me. I’ve got a couple different patterns I haven’t used yet but none are quite what I want, so it’s going to take some altering.

This Period Impressions pattern 1837 Day dress has a front seam that could be changed to be opened, and it’s got those cute sleeve finishes.  Past Patterns #806 Lowell Mill Dress, also has cute sleeves and I bet I could change the front to a front closure but don’t like that straight neckline.


Surprisingly this Butterick 5832, which was copied off an 1841 extant dress, could be used for the V-neckline. I haven’t pulled out the pattern yet so I don’t know if it’s actually pleated in front or if that’s an overlay. And I might be able to extend it to make it a crossover, like this 1838 extant dress. It’s got cute sleeves too. Then someone pointed out View C on this Laughing Moon pattern #103 that has a crossover bodice that might help in my construction, even though its 1890s. As more ideas come in for doing this, the more excited I get. It takes a bit of the scary out of it. 


Speaking of scary; I keep saying I want to make those gathered/smocked sleeves but when it comes right down to it, they look scary. I haven’t found any directions yet how they do those. I’m assuming you cut out the humongous sleeve, then cartridge-pleat/smock wherever you want it, either from the shoulders down, or mid-upper arm, then sew the sleeve seams together. Inquiring minds want to know. I don’t know of anyone who’s tried them yet. I think possibly just gathering them down and putting a ruffle around the bottom might work too. This extant dress shows off the smocking very well. I would also LOVE to find fabric like that. I can’t believe how brilliantly colorful it still is. And again, this makes me want to go fabric shopping, for yet MORE fabric. 

And now, let's talk pelerines! I have a couple antique ones but have been thinking about making some myself. This one from the series Gentleman Jack, looks like one I would enjoy making, and that bonnet included.

These antique ones would be good shapes to try also. Its easier to add ruffles to these than to find an embroidered fabric you could use.


I ran across this one on Pinterest. It has a wide ruffle but finished with a delicate lace trim.

These two are interesting, both from 1837, and the longer one would be fun.


The trick to making these is to shape the pattern to have a curved neck. Otherwise it bunches up around your neck. This photo of the one I own shows that shape. I’ve since done a repair on the little tear with as tiny stitches as I could possibly do, so it wouldn’t tear further. I only wear it for short periods of time, or for fashion shows.


I may have some extra fine cotton voile in my stash somewhere to get started on one of these. And the easiest one to start would be using the pattern I made off of my antique one. Small hand projects seems to be the way to go these days as they don’t seem to be too overwhelming. I’ve still been hand sewing 18th C kerchiefs and selling them almost as soon as I post one, so I’d like to give the 1830s ones a try too.   


Tuesday, August 4, 2020

A TRIO OF 1860s DRESSES ON MY ASSEMBLY LINE

My last post was in May. You’d think by now I’d have a lot more sewing done, what with no costume events, no sewing workshops, no picnics or teas, no fashion shows, no nothing. And that’s about how much sewing enthusiasm I had. Nothing.

Towards the end of June as some businesses and locations were starting to open up (yay, a haircut finally!) my friend Shelley announced she would be able to host a sewing workshop in her church hall where we could socially distance, with a limited number of people. People! We would get to see and talk to people! One of the ideas I’d had for sewing was my new Truly Victorian pattern, #452 for an 1860s Work dress. I liked the gathered front bodice of it, and I wanted to try another one, especially after liking the Simplicity 4551 dress. Except after I’d ordered the work dress, I realized I also had TV 447, the 1863 sheer bodice dress, which was almost the same, and I could have used that. Oh well.


I looked through my fabric stash photos and picked out three, yes three, fabrics, because I was going to cut them all out and then assemble them all together. I would sew all the bodice seams, then the sleeves & cuffs, then attach all those to their bodices, then sew up the skirt seams, and basically just construct the body of the dress. At some point in time, I will pick which one I want to finish first, and then decide on the collar, buttons, and any trims. These aren’t going to be “work dresses” because I don’t plan to make them as that.

Honestly, I can’t even decide which is my favorite fabric. I’ve always loved the red and pink feather design one, and have had that the longest. But I go back and forth between the two blues. The dark blue looks more of a winter color, and the blocked blue on white print is a fine cotton voile from India, so a summer dress.

By going to a sewing workshop, I would be able to sew up my fitting muslin, getting it fitted to me, and work out any bugs. After reading the pattern directions, I realized it had an inside fitted bodice, which I didn’t want to do. I was going to just flatline my fabric with a fine cotton twill to give it body.

After I sewed my muslin together, Shelley noticed that I had pleated the front too far apart between the center and the sides. She said it should actually be gathered and the gathers should be pulled as tightly close to the center front as possible. That was an easy fix. I was able to flat line my three bodices and sew up the side and shoulder seams in class.

In the next few days, I tore my lengths of fabric for my skirts, using 3 ½ panels, and sewed up the side seams on those. I’m going to try the dogleg closure on the skirt waistband and bodice this time so they close in the front as one piece, instead of a skirt and bodice.

And that’s as far as I got by July 1st. 

I went almost a full month before I even felt like sewing up my sleeves and cuffs. The cuffs are extremely narrow, about 2” wide, and the bishop sleeves are very full and blousy at the cuff. Except when I put them on, I felt like I was in a clown suit, and probably would be knocking things over waving my arms as I tend to do. So, I l un-stitched them, and laid them out flat, cut off 2” from each side, for a total of 4”, and sewed them back up. Then they were much better proportioned to me but still full. I sewed them to my bodice, and again, that’s as far as I got.  At this point I decided I would now set them aside to finish later, and pull out three fabrics for some 1830s dresses. My thoughts are I can use up my stash.

Fast forward almost another month, and I thought it was about time I put these on my dress form so I could see what they looked like and take photos of them to show I’d been doing some sewing at least. I was also going to be doing a Zoom class online and after seeing some other people doing theirs, I like the idea of one of my dresses being seen in the background, especially since I would be doing it from my sewing room, and didn’t want the room to look too busy. So here I have each one displayed. The skirts are not cartridge-pleated yet, so I just pinned them to the waist, and added a black belt I had. I’m in the process of ordering some pretty belts from Kristen at Black Orchid, one in red, another in navy blue. This is one of her brown ones, and one of the dresses she made. 

Black Orchid   on etsy. 

I think I could actually interchange both the red and blue colors between the dresses to give them a different look. I also need to make their buttonholes and buttons, and some white collars for each of them.


After watching a bunch of videos and class presentations from both CGW’s Costume Retreat classes and CoCoVid videos last weekend (not affiliated with Costume College/CoCo) I felt a surge of enthusiasm to sew again. Yay! That’s what happens usually when we go to events or classes.

As soon as I’m done with a couple special orders of 18th C. kerchiefs that I’m hand sewing, I’ll start on the cartridge pleating of these, since I like to have handwork at night while watching TV.

And it looks like I’m going to be doing my presentation to the San Diego DAR in October also online. Its going to be a Powerpoint historical fashion show, similar to what I did for them a couple years ago but this time with no live bodies wearing the clothes. At least I still have a few months to work on it, and get better at using Zoom. 

In the meantime, I’m collecting my ideas and photos together for the now four 1830s dresses I want to cut out and do the same assembly line sewing with them. I plan on altering some of them to close in the front since I can’t even fit these on me or put them on without help.

This tote bag was where I would throw my fabric scraps in that eventually made it in the trash, but Chloe has turned it into her sleeping bag.


Sunday, June 10, 2012

ASSEMBLY LINE COSTUME SEWING


I had another question asked of me when I talked about my assembly line method of sewing multiple costumes of the same pattern. How did I ever manage to do it?
At first my answer was easy: cut out multiples of the same pattern, with different fabrics. Once the pattern is cut to size, and the muslin fitted, you could cut out as many fabrics from it as you wanted and start sewing.
It’s not as easy as all that. It requires some thought and planning.
First, a disclaimer: I’ve only done this *four times. And they were fairly easy patterns. My reason for doing this is I wanted more than one dress of each era. And when I make something two or three times, I understand its construction better and it’s easier to make next time. You have to plan ahead of time by having all the fabrics and lining or flat lining fabrics on hand. You don’t need your finishing details until later when you decide to finish the individual gown. *I originally thought I’d only done this twice but after looking thru all my costume photos, I found I had done it two more times but with only making two at a time instead of the three I’d done before*.
My first time I did this was back in 2005 when I was fairly new to costuming. I wanted to have a couple Regency dresses to wear to Costume College, and the quickest way I could do it was cut three out at a time. All were going to be cotton day dresses. I used the Sense & Sensibility pattern which is easy to understand and explains construction in modern sewing terms.
 My fabrics were all small printed floral cottons. Once I cut the pattern to my size and the muslin fit, I laid out each fabric, cut it out, and then laid out the next and cut it. Each also needed to have the bodice lined and I cut that portion out of white muslin. By that time your back is going to be killing you.  You might want to take a couple hours break from this. Or a couple days.
So here was the assembly line: take all the bodice pieces (no sleeves yet), and sew all the side seams. These were bag lined (fabric and lining right sides together, sew with bottom parts open & turn right side out). Take all the skirt parts and sew all the side seams on those. Then sew the sleeve seams & finish the cuffs. Set those aside for when you’re rested and can battle with attaching the “Evil Sleevils”. Now gather and attach all the skirts to all the bottoms of the bodices. Sew the plackets to the back skirt opening, and finish. I did buttonholes on all my bodices. *I now do drawstring closures; much easier.* If you’re ready, begin battle with the “Evil Sleevils” by gathering the caps and attach to the armholes. You may be one of the lucky ones who don’t have problems with sleeves like many of us do. A handy tip from Historical Sewing- Jennifer Rosbrugh: mark the sleeve directly after you cut it so you know the front from back. Use a tiny mark or pin a safety pin on the front part. It will save you from sewing them backwards or putting the right arm in the left armhole. Believe me; I’ve done it more times than I can count.
At this point you can now hem and trim. If you only need one dress now, that’s all you need to finish. I wasn’t much into trimming at this point. I just wanted the dresses done. These are two of the Regency dresses I finished in 2005 back in my pre-Regency stays days. I made two with puffy sleeves, and one with a three quarter length sleeve, so at least I was trying to make them a little different from each other. I’ve since decided short puffy sleeves are not for ladies of a certain age. I don’t have construction photos of any of them, and I’ve since sold the gowns when they became too large.

Three years later I wanted to make a 1795 open robe, again for Costume College, using Butterick’s 4890, and had two lovely fabrics I couldn’t decide which I liked better. So I cut both out at the same time and decided to let the one that was finishing the prettiest be the winner. These were really easy to sew; no sleeves & no closures to speak of. The final finish on these were the trims I sewed on by hand. I made a white peau de soie gown that could be worn under them. As you can see, the periwinkle blue robe was the winner, and is still one of my favorite gowns to this day. Surprisingly, I still haven’t worn the pink one ANYWHERE. But it’s finished, and waiting for that perfect date.


 Three years later I decided now I liked Civil War/1860s gowns after all, and other than wearing them to CW events, I could also wear them in the Riverside Dickens Festival fashion show. I fell in love with the Simplicity 4451 mainly because of the yellow fabric, which I haven’t found any yet, but also the gathered front bodice. Again, these were all made of cotton fabrics, and I flat lined both bodices first, then sewed the side seams, and so forth. CW gowns don’t have too many ways you can trim them but I think the different fabrics made them not so similar to each other.


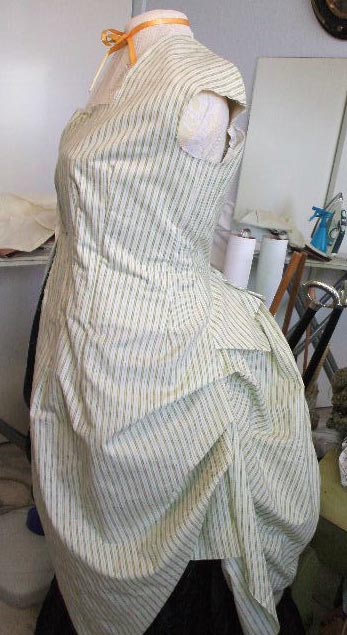
I began my last set of three gowns on an assembly line back in 2009, and am today finishing the last one up that I’ll be wearing tomorrow to the 1870s Bustle Picnic in Los Angeles. This became a very popular pattern with costumers, Truly Victorian’s #410, the 1873 Polonaise. I sewed each one to the almost finished bodice stage, and none had their boning put in at this point. The green striped cotton would have a matching skirt but rather plain since I ran out of fabric. To make it different, I trimmed the front of the square neck and down the front of the bodice & skirt with a white beading eyelet w/ yellow ribbon running through it. I used yellow ribbons as my accent color. The purple and black floral fabric was a polyester blend that I put over a solid black skirt. This fabric lent itself to lot of trimming ideas, and all those black ribbons and buttons and bows and gee-gaws came out of the stash and had a glorious time being added to it. My favorite saying is, “You can’t just bake the cake; you have to decorate it too”.  This gown has received more compliments than any gown I’ve made to date. And it’s polyester. Go poly!  My final gown of a black and white polka dot cotton voile, that has been waiting three years to be completed, has slightly evolved a bit more into the 1880s with the addition of a ruffled apron that goes over the skirt. The skirt is a matching fabric but has a large ruffle along the hem. I tried to make it look different than the previous two.


 So today the last one will be unveiled, and I will have photos of me wearing it, and another blog on its making.